In this tutorial we’re implementing the Mandatory Address selection for our food delivery service BoxtOut. To kick things off we’ll start with the config setup for everything we require first and that’s access to the Google Places Api.
Configuration
We’ll start off by creating our Google Cloud Project and adding the Places Api. Go to https://cloud.google.com if you have an account then click on the “Go to console” button. Then we’ll click on the Project drop down in the top left that looks like this.
![]()
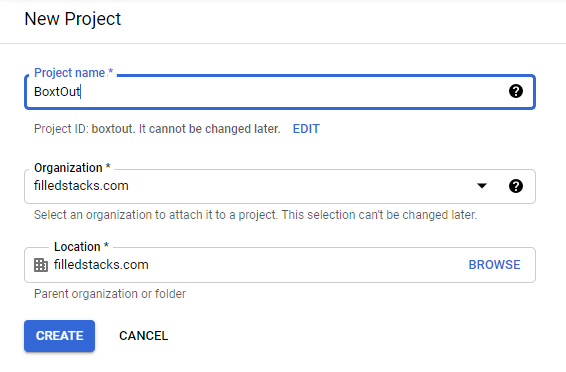
You can then either select the project you want to select or you click on new project. I’ll add a new project called BoxtOut.
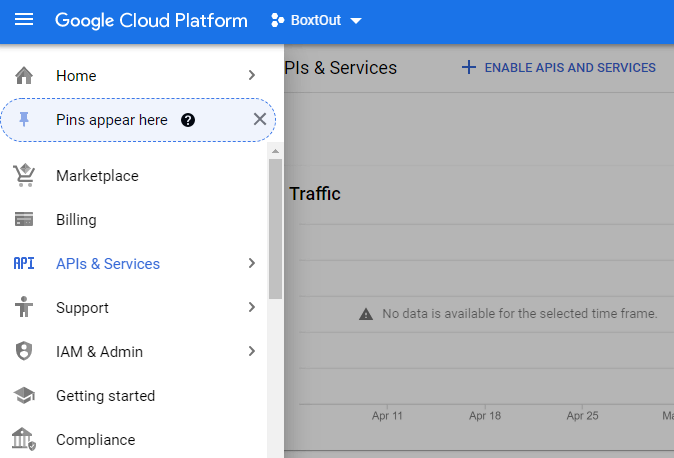
To avoid any info leaking I won’t show much, but after you click create and select the project you’ll land on the dashboard for that project. Then you can click on the hamburger menu on the side and select APIs & Services
Then click on the “Enable API’s and Services” at the top of the page, go to the “Places Api” and click “Enable”. When completed click on the hamburger and go back to “API’s and Services”. Click on Credentials and then the Create Credentials button.
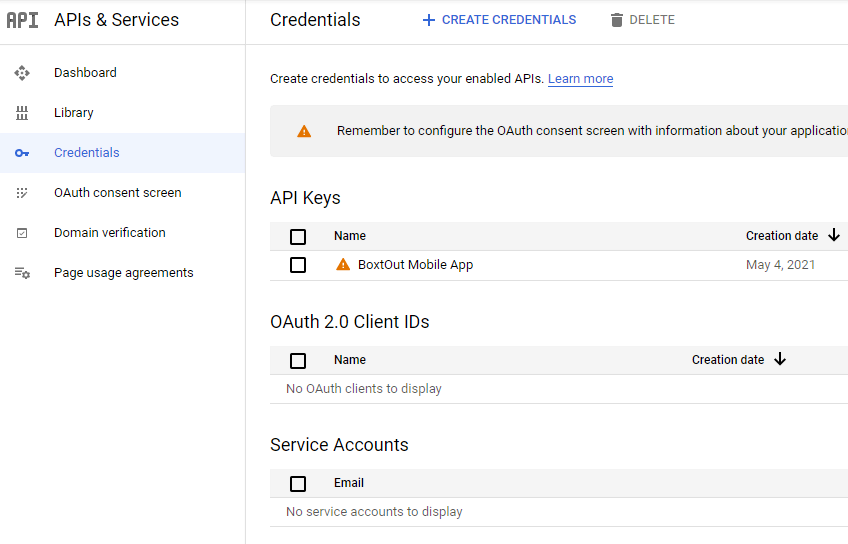
I entered “BoxOut Mobile” as my name and saved that as well as the key. I won’t restrict that now, we’ll do API restrictions later on. And that’s the setup done. Now we can go ahead and work in the code. We’ll start with the functionality.
Functionality
We have to do a few steps to build this functioality
Add the Places Service to the project
First we add the package into our pubspec file
places_service: ^0.1.0Once we have it in the project we add it into the app.dart file.
dependencies: [
		...
    LazySingleton(classType: PlacesService),
  ],
Then we can run the build_runner build function to get that registered with the locator.
Initialise the Service
Once we have that we can initialise the service with the api key from above. Open up the StartupViewModel . We’ll get the PlacesService from the locator and then initialise it at the beginning of the runStartupLogic function call.
class StartUpViewModel extends BaseViewModel {
	...
  final _placesService = locator<PlacesService>();

	Future<void> runStartupLogic() async {
    _placesService.initialize(apiKey: 'API_KEY_FROM_ABOVE');
	}
}
Build Form To take in Address and show results
Open up the AddressSelectionView and we’ll do a basic Stacked forms setup. We’ll define a FormView with one field for address.. Add the Generated mixin, then we’ll use the listenToFormUpdated function to sync values across to the ViewModel.
// 1. Define the form field
@FormView(fields: [
  FormTextField(
    name: 'address',
  )
])
class AddressSelectionView extends StatelessWidget
			with $AddressSelectionView { // 2. Include the Generated Mixin for the form
  AddressSelectionView({Key? key}) : super(key: key);

  @override
  Widget build(BuildContext context) {
    return ViewModelBuilder<AddressSelectionViewModel>.reactive(

      onModelReady: (model) => listenToFormUpdated(model),
      builder: (context, model, child) => Scaffold(
        body: ListView(
          children: [

          ],
        ),
      ),
      viewModelBuilder: () => AddressSelectionViewModel(),
    );
  }
}
For the children of the list view we’ll simply add a normal TextFormField and give it the controller generated. and then we’ll have some conditional UI t either show a message or show the auto complete results
  ListView(
    children: [
			TextFormField(
			      decoration: InputDecoration(hintText: 'Enter your address'),
			      controller: addressController,
			    ),
			    if (!model.hasAutoCompleteResults)
			      Text('We have no suggestions for you'),
			    if (model.hasAutoCompleteResults)
			      ...model.autoCompleteResults.map((autoCompleteResult) => ListTile(
			            title: Text(autoCompleteResult.mainText ?? ''),
			            subtitle: Text(autoCompleteResult.secondaryText ?? ''),
			          ))
]),
Places Logic
Open up the AddressSelectionViewModel where we will build all the functionality required. We’ll start off by getting the PlacesService from the locator and creating the properties to expose the information we’ll get from it.
class AddressSelectionViewModel extends FormViewModel {
  final _placesService = locator<PlacesService>();

  List<PlacesAutoCompleteResult> _autoCompleteResults = [];

  List<PlacesAutoCompleteResult> get autoCompleteResults =>
      _autoCompleteResults;

  bool get hasAutoCompleteResults => _autoCompleteResults.isNotEmpty;

  @override
  void setFormStatus() {

  }
}
We have the autoCompleteResults which will store what the name indicates. And we have a value to check if it’s empty. Then the final piece is to create a function that gets the results from the places api and set it to the _autoCompleteResults.
@override
void setFormStatus() {
	_getAutoCompleteResults();
}

Future<void> _getAutoCompleteResults() async {
  if (addressValue != null) {
    final placesResults = await _placesService.getAutoComplete(addressValue!);

    if (placesResults != null) {
      _autoCompleteResults = placesResults;
      notifyListeners();
    }
  }
}
In this function we check if the addressValue is not null. If it’s not, we get the auto complete results, if that returns anything we assign that value to the _autoCompleteResults. And then we notifyListeners so that our UI can rebuild. The last thing to do is to call the _getAutoCompleteResults function in the setFormStatus override.
If you run your code now you should see the auto complete working just fine.
Protecting your Api keys
One last thing to consider is to make sure you don’t publish any sensitive information to your repo. To achieve this we’ll use a .env file. Open up your pubspec file and add the flutter_dotenv package.
flutter_dotenv: ^4.0.0-nullsafety.1Then in the root of your project create a new file called .env and add that into the assets section of your pubspec as well.
assets:
  - ./.env
This file will contain the key for the google maps api
GOOGLE_MAPS_API_KEY='YOUR_API_KEY'Now you can go back to the StartupViewModel and remove your key and replace it with the value from the env package.
_placesService.initialize(apiKey: env['GOOGLE_MAPS_API_KEY']!);The last thing to do is to initialise that package before we start our application. Open the main file where we’ll import the package as DotEnv and then load our env file.
import 'package:flutter_dotenv/flutter_dotenv.dart' as DotEnv;

Future main() async {
  await DotEnv.load(fileName: ".env");
	...
  runApp(MyApp());
}
And that’s it. You’re ready to roll with places. thanks for reading and I’ll see you in the next episode where we’re building our design system.
Dane