In this series we will be taking an extensive look at how I will architect the applications for my clients moving forward using the Stacked Package. Almost a year ago I release my provider architecture video which was an implementation of MVVM without the two way binding. We used the provider package and had quite a bit of boiler plate to add before we can get started. In the past week I have gone through all of our production code bases here at FilledStacks and have distilled down the features and functionality required to build those applications in a more maintainable way. That’s why the Stacked package was developed. It’s basically v2 of the first architecture and makes provisions for some common functionalities required for State management.
How does stacked work
The architecture functionally consists of only 3 parts. Views, ViewModels and Services. Views on top, the closest to the user, ViewModels are below that taking input from the Views and Services below that which is what the ViewModel’s make use of to provide functionality. That’s it. It comes with some rules that I highly recommend not to break.
- Views should never MAKE USE of a service directly.
- Views should contain zero to (preferred) no logic. If the logic is from UI only items then we do the least amount of required logic and pass the rest to the ViewModel.
- Views should ONLY render the state in its ViewModel.
- 1 View has 1 ViewModel
- ViewModels for widgets that represent page views are bound to a single View only.
- ViewModels may be re-used if the UI requires the exact same functionality.
- ViewModels should not know about other ViewModels**
Along with the 3 pillars above, something I would like to adopt is, any service / class that is not a ViewModel, that makes use of multiple services should be called a manager. This is something that I saw would have helped me distinguish better in code which services depend on other services and which are stand alone services. This is not a HARD rule but it’s something I’ve been thinking about so in this series we will be using that rule.
What’s required for a Mobile Application’s Architecture?
There are a few core things which I didn’t want to force onto the users of the stacked package because I want it to only take on the state management portion of the architecture. The only thing it provides is the ViewModel to View functionality along with some additional functionalities that make it easier to react to changes in services in multiple ViewModels. That’s what this series is about. It goes over everything required to build a solid architecture on which you can build your mobile apps. Lets go over the important things that we have required consistently for a mobile application’s architecture.
- State Management: This is how you manage keeping the state of the application in sync with what’s being shown on the UI. We’ll be using Stacked for this part
- Navigation: For this we’ll be using Flutters built in named routing functionality along with Get and auto_route to remove all the boilerplate code.
- Inversion of Control: This is a fancy term for using Dependency Injection or Service Location. For this we’ll use get_it and injectable to generate all the service code.
- Data Models: Here we will be using Freezed and Json_serializable to generate all of our models required in the app.
Those are the core pieces of an application architecture that I want to cover. The rest is all implementation details, things like http requests for API integrations, using native code through plugins, local databases, etc. That’s all implementation details and has nothing to do with the Flutter architecture.
Our goal
The goal of this tutorial is to cover the complete setup for the architecture ONLY. The rest of the series, after this tutorial, will deep dive on specific parts of the architecture and implementation details. Before we begin I’d like to say that this will not cover any beginner functionalities, nothing about Flutter and how it works and definitely not anything about Object Oriented programming. I expect you to understand why state management is important, why inversion of control is required and why separation of concerns allows for better code maintenance.
Setup
We will start with the powerful and simple flutter create command.
flutter create my_appAdding Stacked
The first thing I want to do is add stacked into the project and setup a basic View->ViewModel binding for you to see. Open up the pubspec.yaml file and add the stacked package.
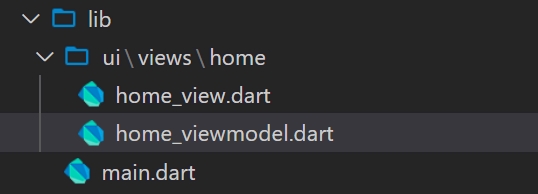
stacked: ^1.2.2Under the lib folder create a new folder called ui. Inside that folder create a new folder called views and inside that folder create a new folder called home. Inside the home folder you will create two new files, home_view and home_viewmodel. The FilledStacks team pointed out to me that it makes more sense to have the view and the ViewModel in the same folder so that’s what we’re going to be doing now going forward.
The home view will have the basic code for associating a view with a ViewModel.
import 'package:stacked/stacked.dart';

class HomeView extends StatelessWidget {
  @override
  Widget build(BuildContext context) {
    return ViewModelBuilder<HomeViewModel>.reactive(
      builder: (context, model, child) => Scaffold(
        body: Center(
          child: Text(model.title),
        ),
      ),
      viewModelBuilder: () => HomeViewModel(),
    );
  }
}
The builder provides the UI that will be “built from” the ViewModel. As you see we’re using the .reactive named constructor. This indicates that the builder will be called to rebuild the UI every time notifyListeners is called in the ViewModel. There’s also a constructor .nonReactive which will only build the UI once and it won’t rebuild when notifyListeners is called in the ViewModel. The ViewModel looks as follows.
import 'package:stacked/stacked.dart';

class HomeViewModel extends BaseViewModel {
  String _title = 'Home View';
  String get title => _title;
}
Open up the main view and add HomeView as the home widget.
class MyApp extends StatelessWidget {
  @override
  Widget build(BuildContext context) {
    return MaterialApp(
      title: 'Flutter Demo',
      home: HomeView(),
    );
  }
}
Run the app and you’ll see the title from the HomeViewViewModel in the centre of the view. That’s the basics of binding a view to a ViewModel. The reason we have this separation is to move all state and logic out of the view into the ViewModel giving you a good separation of logic and a clear guideline for where to put your logic. Each view should have it’s own ViewModel and one view should never have 2 ViewModels.
Update and rebuild
To rebuild the UI you call notifyListeners in the ViewModel. Lets make a quick, non-production example just to get the idea across. We’ll create a local counter variable and a function to update it and we’ll call notifyListeners when we’ve updated the counter. Update the HomeViewModel to the following.
class HomeViewModel extends BaseViewModel {
  String _title = 'Home View';
  String get title => '$_title counter:$counter';

  int _counter = 0;
  int get counter => _counter;

  void updateCounter() {
    _counter++;
    notifyListeners();
  }
}
In the view we’ll add a Floating Action button and call the updateCounter function from the onPressed. Update the HomeView build function to return the following.
return ViewModelBuilder<HomeViewModel>.reactive(
  builder: (context, model, child) => Scaffold(
    body: Center(
      child: Text(model.title),
    ),
    floatingActionButton: FloatingActionButton(
      onPressed: model.updateCounter,
    ),
  ),
  viewModelBuilder: () => HomeViewModel(),
);
If you run the code now and press the floating action button you’ll see the text update as the counter updates. That’s the basics of the View to ViewModel relationship and the basis of the state management of this architecture. You update a property or variable that your widget will be using, when the update is complete you call notifyListener and your UI is rebuilt with the new ViewModel state. Next up we’ll setup the navigation.
Navigation
For navigation we will use get and auto_route to generate our routes for us. Please keep in mind that each of these parts of the architecture will get it’s own dedicated tutorial to cover most of the scenarios that commonly comes up while developing an application. This tutorial is dedicated only to setting up the architecture with some basic examples. To start off lets create a second view. We’ll call it StartupView. Under the views folder create a new file called startup, copy the home_view and home_viewmodel files and name it startup_view and startup_viewmodel and replace Home with Startup. It should look like below.
// startup_view.dart
class StartupView extends StatelessWidget {
  @override
  Widget build(BuildContext context) {
    return ViewModelBuilder<StartupViewModel>.reactive(
      builder: (context, model, child) => Scaffold(
        body: Center(
          child: Text('Startup View'),
        ),
        floatingActionButton: FloatingActionButton(
          onPressed: () {},
        ),
      ),
      viewModelBuilder: () => StartupViewModel(),
    );
  }
}
And the ViewModel can be empty for now.
class StartupViewModel extends BaseViewModel {}Now that we have 2 views we can setup auto_route. Open your pubspec add auto_route with the auto_route_generator and build_runner package as a dev_dependency.
dependencies:
  auto_route:
  # see below for explanation
  stacked_services:

dev_dependencies:
  build_runner:
  auto_route_generator:
I mentioned that we’ll be using get, you can add it to your project if you need more functionality than what I require at the moment. If you used the v1 of this architecture you’ll remember that I like to use a NavigationService so that I can get it from the locator and not depend on the context or any specific package. To aid with this I have built a package called stacked_services which you can add to your project that contains the basic implementation of a NavigationService. In the lib folder create a new folder called app. This will contain the app wide functionality classes like the locator, logger and router. Inside create a new file called router.dart
@MaterialAutoRouter()
class $Router {
  @initial
  StartupView startupViewRoute;

  HomeView homeViewRoute;
}
auto_route allows you to easily define your routes and then generate the rest of the code that we use to write manually. You have to prefix the Router class with $. The class that’s generated doesn’t have the $ and that’s the one we’ll use in our code. We set the startupViewRoute as our initial route which basically only makes the generated route name ’/’ instead of ‘/startupViewRoute’. To generate the routing code run the following command.
flutter pub run build_runner buildNow you’ll see a new router.g.dart file created underneath your router.dart file. This contains all the code we’ll require for our routing setup. Open up the main.dart file and we’ll set the initialRoute and the onGenerateRoute function. Open up the main.dart file and update it to the following.
class MyApp extends StatelessWidget {
  @override
  Widget build(BuildContext context) {
    return MaterialApp(
      title: 'Flutter Demo',
      initialRoute: Routes.startupViewRoute,
      onGenerateRoute: Router().onGenerateRoute,
    );
  }
}
If you run it now you’ll see the app starts up on the startup view. To complete the setup of the navigation and use it in the ViewModel we’ll have to incorporate get_it and injectable as well. Injectable is just a small addition that will generate all our locator code for services and classes annotated with the injectable annotations. You can use get_it as I’ve shown in other tutorials. I will show a non-injectable version as well for those that don’t like code generation.
Inversion of Control
The next big part of any application architecture is inversion of control. For that we’ll be using get_it and injectable. Open up your pubspec file and add the following.
dependencies:
  ...
  get_it:
  injectable:

dev_dependencies:
  ...
  injectable_generator:
Then create a new file in the app folder called locator.dart
import 'package:get_it/get_it.dart';
import 'package:injectable/injectable.dart';
// Important. Impore the locator.iconfig.dart file
import 'locator.iconfig.dart';

final locator = GetIt.instance;

@injectableInit
void setupLocator() => $initGetIt(locator);
setupLocator is the function to call before the app starts to make sure all the services are registered with the get_it instance. Open the main file and call setupLocator before we run the app.
import 'app/locator.dart';

void main() {
  setupLocator();
  runApp(MyApp());
}

class MyApp extends StatelessWidget {
 ...
}
I know this is quite a bit of setup before doing anything but I didn’t want to wrap this all up into the package. I’ll be building additional packages that does all this setup for you so that you can choose which ones to use with your implementation of the stacked_architecture. I’d rather use existing packages than writing my own. The next thing we have to do is register the services from Stacked Services with the locator. To do this we’ll register a module. Under the lib folder create a new file called services. Inside create a new file called third_party_services_module.dart
import 'package:injectable/injectable.dart';
import 'package:stacked_services/stacked_services.dart';

@registerModule
abstract class ThirdPartyServicesModule {
  @lazySingleton
  NavigationService get navigationService;
  @lazySingleton
  DialogService get dialogService;
}
Run the build command to generate the injection code for the get_it service locator.
flutter pub run build_runner buildThose services will be registered with your locator and ready for use. If you don’t want to use injectable you can register the services normally like below
void setupLocator() {
  locator.registerLazySingleton(() => NavigationService());
  locator.registerLazySingleton(() => DialogService());
}
Now that we’ve registered that we can finally set the navigation key in the main file and use the navigation service in the startup viewmodel. Open up the main.dart file and set the navigationKey.
class MyApp extends StatelessWidget {
  @override
  Widget build(BuildContext context) {
    return MaterialApp(
      ...
      navigatorKey: locator<NavigationService>().navigatorKey,
    );
  }
}
Then you can use the NavigationService in the StartupViewModel as it’s intended to be used.
class StartupViewModel extends BaseViewModel {
  final NavigationService _navigationService = locator<NavigationService>();

  Future navigateToHome() async {
    await _navigationService.navigateTo(Routes.homeViewRoute);
  }
}
In the View you can now call navigateToHome from the floating action button on Pressed.
class StartupView extends StatelessWidget {
  @override
  Widget build(BuildContext context) {
    return ViewModelBuilder<StartupViewModel>.reactive(
      ...
      floatingActionButton: FloatingActionButton(
          onPressed: () => model.navigateToHome(),
        ),
      ),
    );
  }
}
Run the app now and you can navigate to the HomeView using the floating action button. Those are the major things for the architecture that I wanted to cover because it takes care of all the setup from flutter create to the complete basics of the architecture at hand. In this series we’ll be building a real world example using the json placeholder API much like the first application that we built. Real world implementations involve:
- Some kind of Authentication: We’ll get user id and get the user profile on login
- Fetching info from the api: We’ll get the posts to show
- Fetching additional data upon navigation
- Keeping all the data in sync
- Startup logic for the application. If the user “logged” in before we skip login
- MAYBE: Persistent Data functionality. Since this is an implementation detail of the application type I’m hesitant to do this but it’s in my mind as well.
Covering those scenarios will allow us to cover everything that’s required when building an application using this architecture, the main things I’d like to get across in this series is:
- Creating services
- Show how to keep ViewModels in sync with services
- Using services in ViewModels
If you’d like me to cover something else in terms of the architecture please let me know on twitter or Slack which you can find at the bottom of this page.