Having previously setup our Firebase emulator with some nice fake data. We now have to connect our Flutter application to our emulator. This will give us the perfect environment to develop our application without racking up the bills.
Start Firebase Emulators
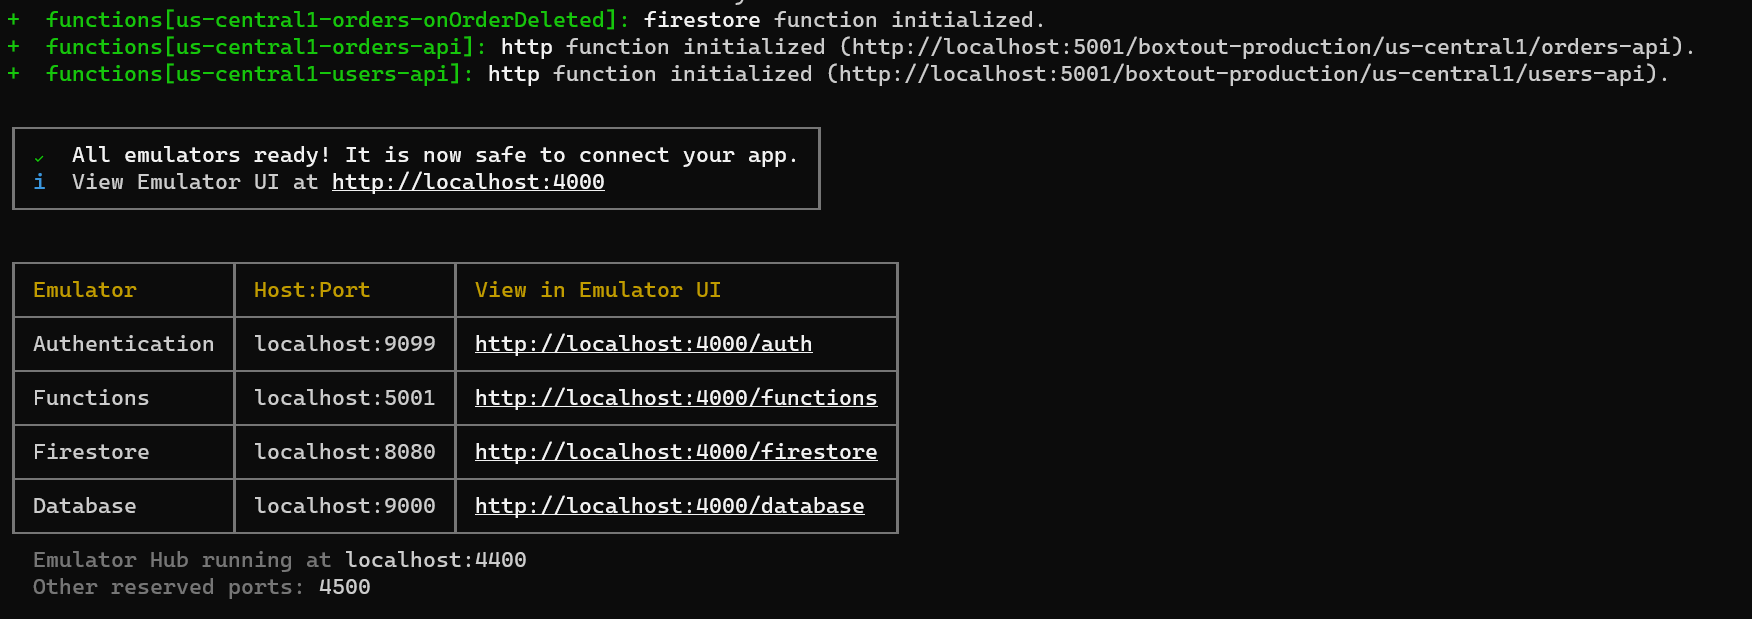
Before we write any code, we will start the emulators. In your backend run the command
firebase emulators:startThis will print out all the local ports that we’ll need to point to when setting up our emulator connection.
Implementation
Open main.dart and at the top of this file we’ll have a new boolean to indicate emulator usage.
const bool USE_EMULATOR = true;We will also create a new function that encapsulates all the Firebase emulator setup. The function will be quite basic. The first thing we’ll do is make sure that we have the correct representation of localhost for the platform we are on. The Android emulators prefer if you refer to your local host as 10.0.2.2 and the other platforms are happy with localhost. Once we have that we can set the local settings on the different Firebase features we want to use. In our case we want to point the FirebaseFirestore instance to local host port 8080 as shown in the logs above from starting the emulator. And for the FirebaseAuth we want to point it to port 9099.
/// Connnect to the firebase emulator for Firestore and Authentication
Future _connectToFirebaseEmulator() async {
  final localHostString = Platform.isAndroid ? '10.0.2.2' : 'localhost';

  FirebaseFirestore.instance.settings = Settings(
    host: '$localHostString:8080',
    sslEnabled: false,
    persistenceEnabled: false,
  );

  await FirebaseAuth.instance.useEmulator('http://$localHostString:9099');
}
When we can update our main function and if USE_EMULATOR is true we call _connectToFirebaseEmulator .
Future main() async {
  WidgetsFlutterBinding.ensureInitialized();
  await Firebase.initializeApp();

  if (USE_EMULATOR) {
    await _connectToFirebaseEmulator();
  }

  setupLocator();
  runApp(MyApp());
}
Now you can run your app (on a simulator or emulator) and use it normally. You’ll see everything working the same, with the one change being that the Authentication and the Firestore instances being used is on the local Firebase Emulator.
If you get a clear test error, remember to add the allowClearText attribute to the AndroidManifest.xml application tag.
Testing on a real device
If you’re like me and you like to debug on a real device then you’ll need to make a few adjustments to the project to get it working. The first thing is to get your ip address of your computer, or an ip you can reference from outside of your network that points to your machine. Then you’re going to open up your firebase.json file and add your host in there.
{
  "emulators": {
    "auth": {
      "host": "0.0.0.0",
      "port": 9099
    },
    "functions": {
      "port": 5001
    },
    "firestore": {
      "host": "0.0.0.0",
      "port": 8080
    },
    "database": {
      "port": 9000
    },
    "ui": {
      "enabled": true
    }
  }
}
Now when you run firebase emulators:start you’ll see on the left side of your firebase logs (like the ones printed out at the start), in the Host:Port column you will now see the host that you’ve added in there.
Updating the Flutter App
Now you can go back to main.dart and update your localHostString to the host specified address.
final localHostString = '0.0.0.0';Now you’ll be able to run the emulator on a real device. The reason I don’t like using this method is because each dev has to update the host ports in the firebase.json file. As well as the host in the flutter code to match. This means get their ip address and add it every time code has been pulled or merged. So this is just here for completeness, I won’t be setting up the code like this in the project. Each dev that requires it can go through the effort of adding their ip when hosting the emulator suite.
That’s all for this week. Thanks for reading 🥰