Hi there,
Welcome to the Push Notification Tutorial in the Free Firebase and Flutter Course. You’ll probably get bored with my development style because everything is so easy to implement 😅 What we’ll do is … Create a PushNotificationService register in the startup logic then navigate in the onLaunch and onResume when a message is opened (if we have to).
This tutorial assumes you have setup your firebase project and created custom startup logic for skipping the auth view when logged in. You can download the starting code here if you haven’t been following along or use your own project.
Implementation: Project Setup
There’s a few things that have to happen before PushNotifications will work. Like with the other firebase libraries we need the google services setup (which we’ve already done). If you haven’t follow this guide here then come back here. The only part we’re interested in is to enable the FirebaseMessaging library to read our push notification payload and pass it as a message to the configure callback functions (you’ll see below which functions I’m talking about). Open up the AndroidManifest and add the following intent-filter under the intent-filter in the application / activity tags
 <application ...>
    <activity ... >

  <intent-filter>
      <action android:name="android.intent.action.MAIN"/>
      <category android:name="android.intent.category.LAUNCHER"/>
  </intent-filter>

  <!-- Add below to ensure we get the payload when tapping on a notification -->
  <intent-filter>
      <action android:name="FLUTTER_NOTIFICATION_CLICK" />
      <category android:name="android.intent.category.DEFAULT" />
  </intent-filter>

    </activity>
</application>
That’s all we need for Android. Lets look at the important parts for iOS. Make sure you have your certificates generated for Push Notifications and Have added the GoogleService-Info.plist file into your project. Those steps can be seen here under iOS Integration. Open up your project in Xcode using the workspace. Select the runner in the Project Navigator and turn on Push Notifications, Background Modes and under Background Modes enable Background Fetch and Remote notifications.
Open up your AppDelegate.m file and add
if (@available(iOS 10.0, *)) {
  [UNUserNotificationCenter currentNotificationCenter].delegate = (id<UNUserNotificationCenterDelegate>) self;
}
This part is usually the trickiest so make sure to go over this guide again if your notifications is not working. The cert generation is the part that messes up the notifications usually.
Implementation: Code
Onto the code! Start by adding the firebase_messaging package to your pubspec
firebase_messaging: ^5.1.4Then we’ll create a new file under the services folder called push_notification_service.dart. We’ll have a class called PushNotificationService and we’ll store a local instance of the FirebaseMessaging class. In this class we’ll have an initialise function that does the following things.
- Request the permissions for iOS if the platform isIOS.
- Configure the callback functions for when we receive a push notification
class PushNotificationService {
  final FirebaseMessaging _fcm = FirebaseMessaging();

  Future initialise() async {
    if (Platform.isIOS) {
      _fcm.requestNotificationPermissions(IosNotificationSettings());
    }

    _fcm.configure(
      onMessage: (Map<String, dynamic> message) async {
        print("onMessage: $message");
      },
      onLaunch: (Map<String, dynamic> message) async {
        print("onLaunch: $message");
      },
      onResume: (Map<String, dynamic> message) async {
        print("onResume: $message");
      },
    );
  }
}
The callbacks are called at the following times.
- onMessage: When the app is open and it receives a push notification
- onLaunch: When the app is completely closed (not in the background) and opened directly from the push notification
- onResume: When the app is in the background and opened directly from the push notification.
The onLaunch and onResume callbacks is where you would deserialise your message and navigate or use that information to do something in the app. Next, open up the locator and register the PushNotificationService as a lazy singleton.
locator.registerLazySingleton(() => PushNotificationService());The next thing for us to do is call the initialise function as the first line in our startup logic. Open up the StartupViewModel, get the PushNotificationService from the locator and call initialise.
class StartUpViewModel extends BaseModel {
  final PushNotificationService _pushNotificationService =
      locator<PushNotificationService>();

  Future handleStartUpLogic() async {
    await _pushNotificationService.initialise();
    ...
  }
}
That’s it for push notification implementation 😅 Open up the firebase console project. In the left toolbar scroll to the bottom under the grow section and click on Cloud Messaging. There you will see the Get Started section.
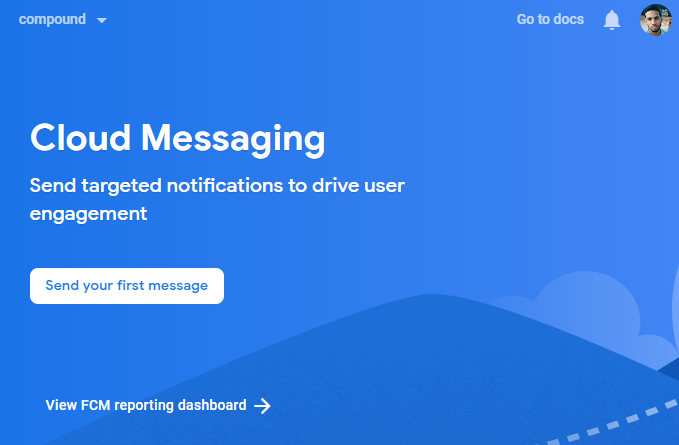
Click on “Send your first message”. Enter all the details, make sure your app is in the background or completely closed. Enter a title and a message then go next until you hit review. Review the message and then send it off.
You should see a little notification in your tray with the message you just sent. Open that and you’ll open the app :)
Notification Navigation
The next thing we’ll do is add some custom logic for when a user opens a specific kind of notification. Open up the PushNotificationService file. We’ll start by importing the NavigationService. Then in the initialise function, in the onLaunch and onResume functions we will call a new function _serialiseAndNavigate that takes in the message. In this function we will get the notificationData sent in the payload. In that map we’ll get a value out that we supplied called view. This will contain a value create_post which we’ll check for. If the notification has that value we will navigate to the CreatePostViewRoute.
  final NavigationService _navigationService = locator<NavigationService>();

  Future initialise() async {
    _fcm.configure(
      onLaunch: (Map<String, dynamic> message) async {
        log.d("onLaunch: $message");
        _serialiseAndNavigate(message);
      },
      onResume: (Map<String, dynamic> message) async {
        log.d("onResume: $message");
        _serialiseAndNavigate(message);
      },
    );
  }

  void _serialiseAndNavigate(Map<String, dynamic> message) {
    var notificationData = message['data'];
    var view = notificationData['view'];

    if (view != null) {
      // Navigate to the create post view
      if (view == 'create_post') {
        _navigationService.navigateTo(CreatePostViewRoute);
      }
      // If there's no view it'll just open the app on the first view
    }
  }
That’s it for the push notification implementation. To get the message in the call back functions when you click on the notification you have to add an additional key and value into the push notification payload. Send a push notification with additional key: click_action and value: FLUTTER_NOTIFICATION_CLICK. This will then tell the OS to pass the payload from the notification to the callback functions registered above.
To subscribe/unsubscribe to topics for the app you can use/
await _fcm.subscribeToTopic(topic);
// or
await _fcm.unsubscribeFromTopic(topic);
Then when sending a message make sure to supply the topic you want to send to where it asks for the segment. Also if you want to make use of the token to supply to your API backend you can call getToken on the FirebaseMessaging instance to get that.
That’s it for push notifications basics, setting up and handling custom logic for you notifications.
Thank you for reading, We’ll talk next week.