Motivation and Context
Since the announcement of AppSkeletons I’ve been expecting a few people to show up and check it out. My girlfriend asks me everyday “how many new users, how many apps created” and I have to log onto the firebase console and look through there. I didn’t have a count or any kind of stats, so I would just see if there’s more entries than the last time. Then I decided to make a simple app, using a template from AppSkeletons.
In this guide we’ll be adding Realtime updates from Firestore and the stats collection.
Here’s a quick overview of what this series will cover
- Realtime updates from Firestore and my stats collection
- Realtime updates on the number of open Feedback logged
- Ability to view the titles and the details provided, mark as read, close feedback and add notes
- Push notifications for feedback labeled as bugs
- Viewing error details and error groups
- Abillity to add notes to errors from the device
- Asigning errors to work tasks
Implementation
We’ll start off by generating a starting template using AppSkeletons. If you don’t want to sign up for a free account then you can clone this repo, open up 008-skeleton-watcher and then open the start folder in your IDE, I’ll put my generated project in there. If you cloned the repo you can skip the Generate starting template below.
Generate starting template
Go to appskeletons.com and sign up for a new account, or login if you have one (Thank you if you did check it out already 😊). In the bottom right go to “Create project”, select Flutter and then ScopedModel.
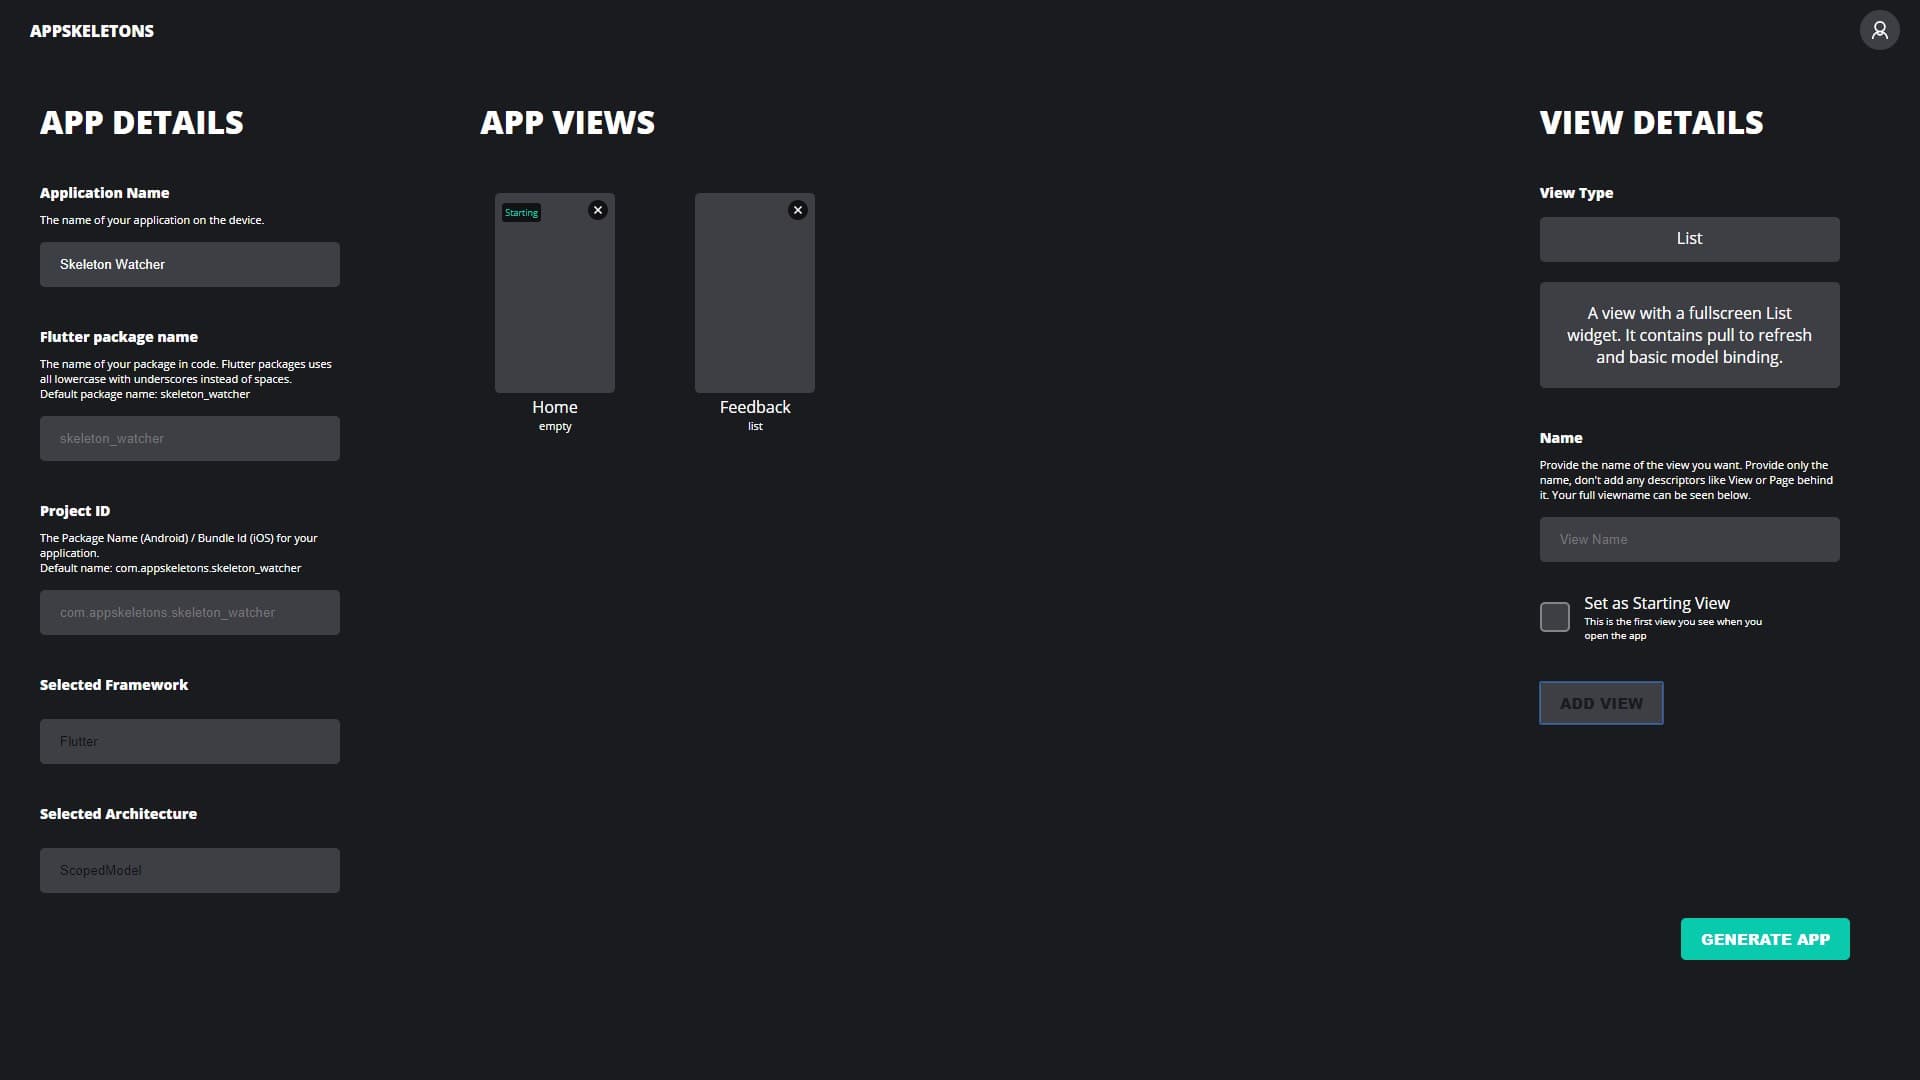
On the details view, enter the app name “Skeleton Watcher”, leave the other default values for projectId and package name. Go to the right side, make sure the view type is set to Empty. Below the type enter “Home” as the view name and press enter. Click on the view type drop down and select List. Put “Feedback” as the view name and press enter. Click on generate code and download the code. Unzip the code and open it up in your IDE.
Implementation overview
The code architecture we have is setup according to this tutorial. This app only have 2 views so ScopedModel will be perfect to handle all the state requirements. Here’s what we want to happen in our app.
- Connect to the Firestore service and get realtime updates
- Update our model state whenever a new update/snapshot is emitted from the service
- Display new updates in a pleasing manner to the user (Me 😁)
You mind a little quote? in the book by 37 Signals, ReWork they say (paraphrasing)
“Scratch your own itch. If you’re always trying to guess what your users want then you’re playing in the Dark. If you’re building something for yourself, that you’ll use, then suddenly you know exactly what to do and where to go. All the answers lie with you”.
Since I’m building this app for me to use personally to monitor my stats. I know what I want it to do, not do, and how it should look. So I can easily choose architecture and navigate the scenarios knowing what features I expect to build in the Future.
Setting up Firestore
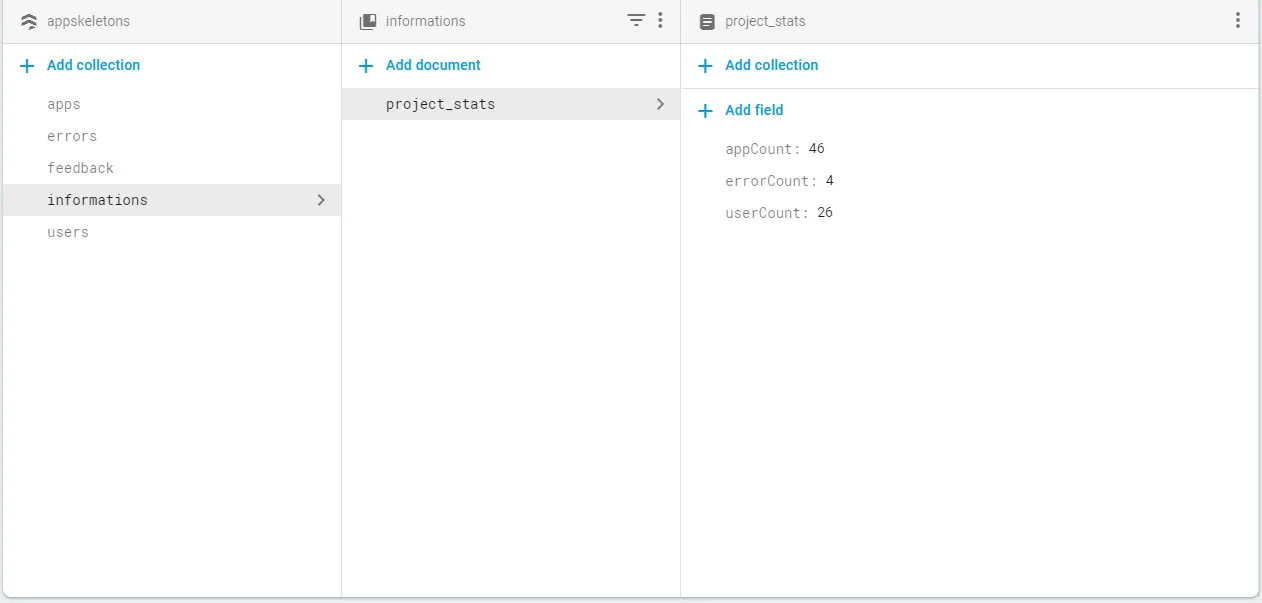
On the Firestore side I have a root collection called informations. It has a project_stats document (I used underscores to indicate it’s not for general consumption) and in there it has 3 fields. appCount, errorCount and userCount all number fields. Setup something similar your side, firebase accounts are free you should have one.
Connecting Firestore in Flutter
Import the cloud_firestore package in your pubspec file
cloud_firestore:then follow the following guide based on your platform. We won’t cover the entire setup in this tutorial, google does a better job at it.
Create a folder under lib called services, in the folder create a new file called firebase_service.dart.
class FirebaseService {

}
And register the service with your locator in service_locator.dart
locator.registerLazySingleton(() => FirebaseService());We’ll start be adding all the logic we need to get the stats from the Firebase service. This is how the implementation will go.
- Get the realtime document snapshot stream from Firebase
- Convert that to a model our app understands
- Put that data onto a stream that’s publicly exposed
Get realtime document snapshot stream
In your firebase service create a constructor and subscribe to changes from the project_stats doc under the informations collection.
Firestore.instance // Get the firebase instance
        .collection('informations') // Get the informations collection
        .document('project_stats') // Get the project_stats document
        .snapshots() // Get the Stream of DocumentSnapshot
        .listen(_statsUpdated); // Listen to it and conver
Convert document snapshot to a model
In the lib folder, there’s a folder called models. Open it and create a new file called stats.dart. We’ll give it int properties to represent our field data in the document and also give it a static fromSnapshot function that allows us to pass a DocumentSnapshot.
import 'package:cloud_firestore/cloud_firestore.dart';

/// Represents the stats from the Firebase service
class Stats {
  final int userCount;
  final int appCount;
  final int errorCount;

  Stats({this.userCount, this.appCount, this.errorCount});

  Stats.fromSnapshot(DocumentSnapshot snapShot) :
   appCount = snapShot['appCount'] ?? 0,
   userCount = snapShot['userCount'] ?? 0,
   errorCount = snapShot['errorCount'] ?? 0;
}
Put the converted data onto a public Stream
Create a new function called _statsUpdated that takes a DocumentSnapshot. This function will convert the snapshot to a Stats object and put it onto a stream. We’ll use a basic Stream Controller
final StreamController<Stats> _statsController = StreamController<Stats>();

...

void _statsUpdated(DocumentSnapshot snapshot) {
_statsController.add(Stats.fromSnapshot(snapShot));
}
Last thing we have to do is expose the stream publicly so that our models can listen to it. Add a getter onto the service that returns the controller’s stream.
Stream<Stats> get appStats => _statsController.stream;Showing stats in HomeView
To get the data to our HomeView UI we need to use it in our Model. The UI will only display what’s in the model and will never have contact with the service.
Go to the HomeViewModel, get a _firebaseService from the Locator add a Stats property (for binding in the UI).
class HomeViewModel extends BaseModel {
  FirebaseService _firebaseService = locator<FirebaseService>();
  Stats appStats;
}
In the implementation overview at the beginning we mentioned “Update our model state whenever a new update/snapshot is emitted from the service”. To accomplish this we’ll register to the stream in the Constructor and listen using a function called _onStatsUpdated that takes in a Stats parameter.
HomeViewModel() {
  _firebaseService.appStats.listen(_onStatsUpdated);
}

void _onStatsUpdated(Stats stats) {
  appStats = stats; // Set the stats for the UI

  if(stats == null) {
    setState(ViewState.Busy); // If null indicate we're still fetching
  } else {
    setState(ViewState.DataFetched); // When not null indicate that the data is fetched
  }
}
Now when ever the project_stats document updates we’ll set the appStats and then emit the correct state. When we call setState in the model the state property on the BaseModel is updated and notifyListeners is called. In the UI we can listen to the state changes and display UI accrodingly.
Go to the HomeView file. Replace the body of the Scaffold with a _getBody function that takes in a model and the build context. This function will check the model state using a switch and return the appropriate UI.
class HomeView extends StatelessWidget {
  @override
  Widget build(BuildContext context) {
    return  BaseView<HomeViewModel>(
        builder: (context, child, model) => Scaffold(
        backgroundColor: Theme.of(context).backgroundColor,
        body: _getBody(model, context)
          )
        );
  }

  Widget _getBody(HomeViewModel model, BuildContext context) {
    switch (model.state) {
      case ViewState.Busy:
      case ViewState.Idle:
        return Center(child: CircularProgressIndicator());
      default:
        return _getStatsUi(model, context);
    }
  }
}
Then we’ll create the function to return the stats UI. We won’t cover building and styling the UI in this guide. We want the home view to look something like this.
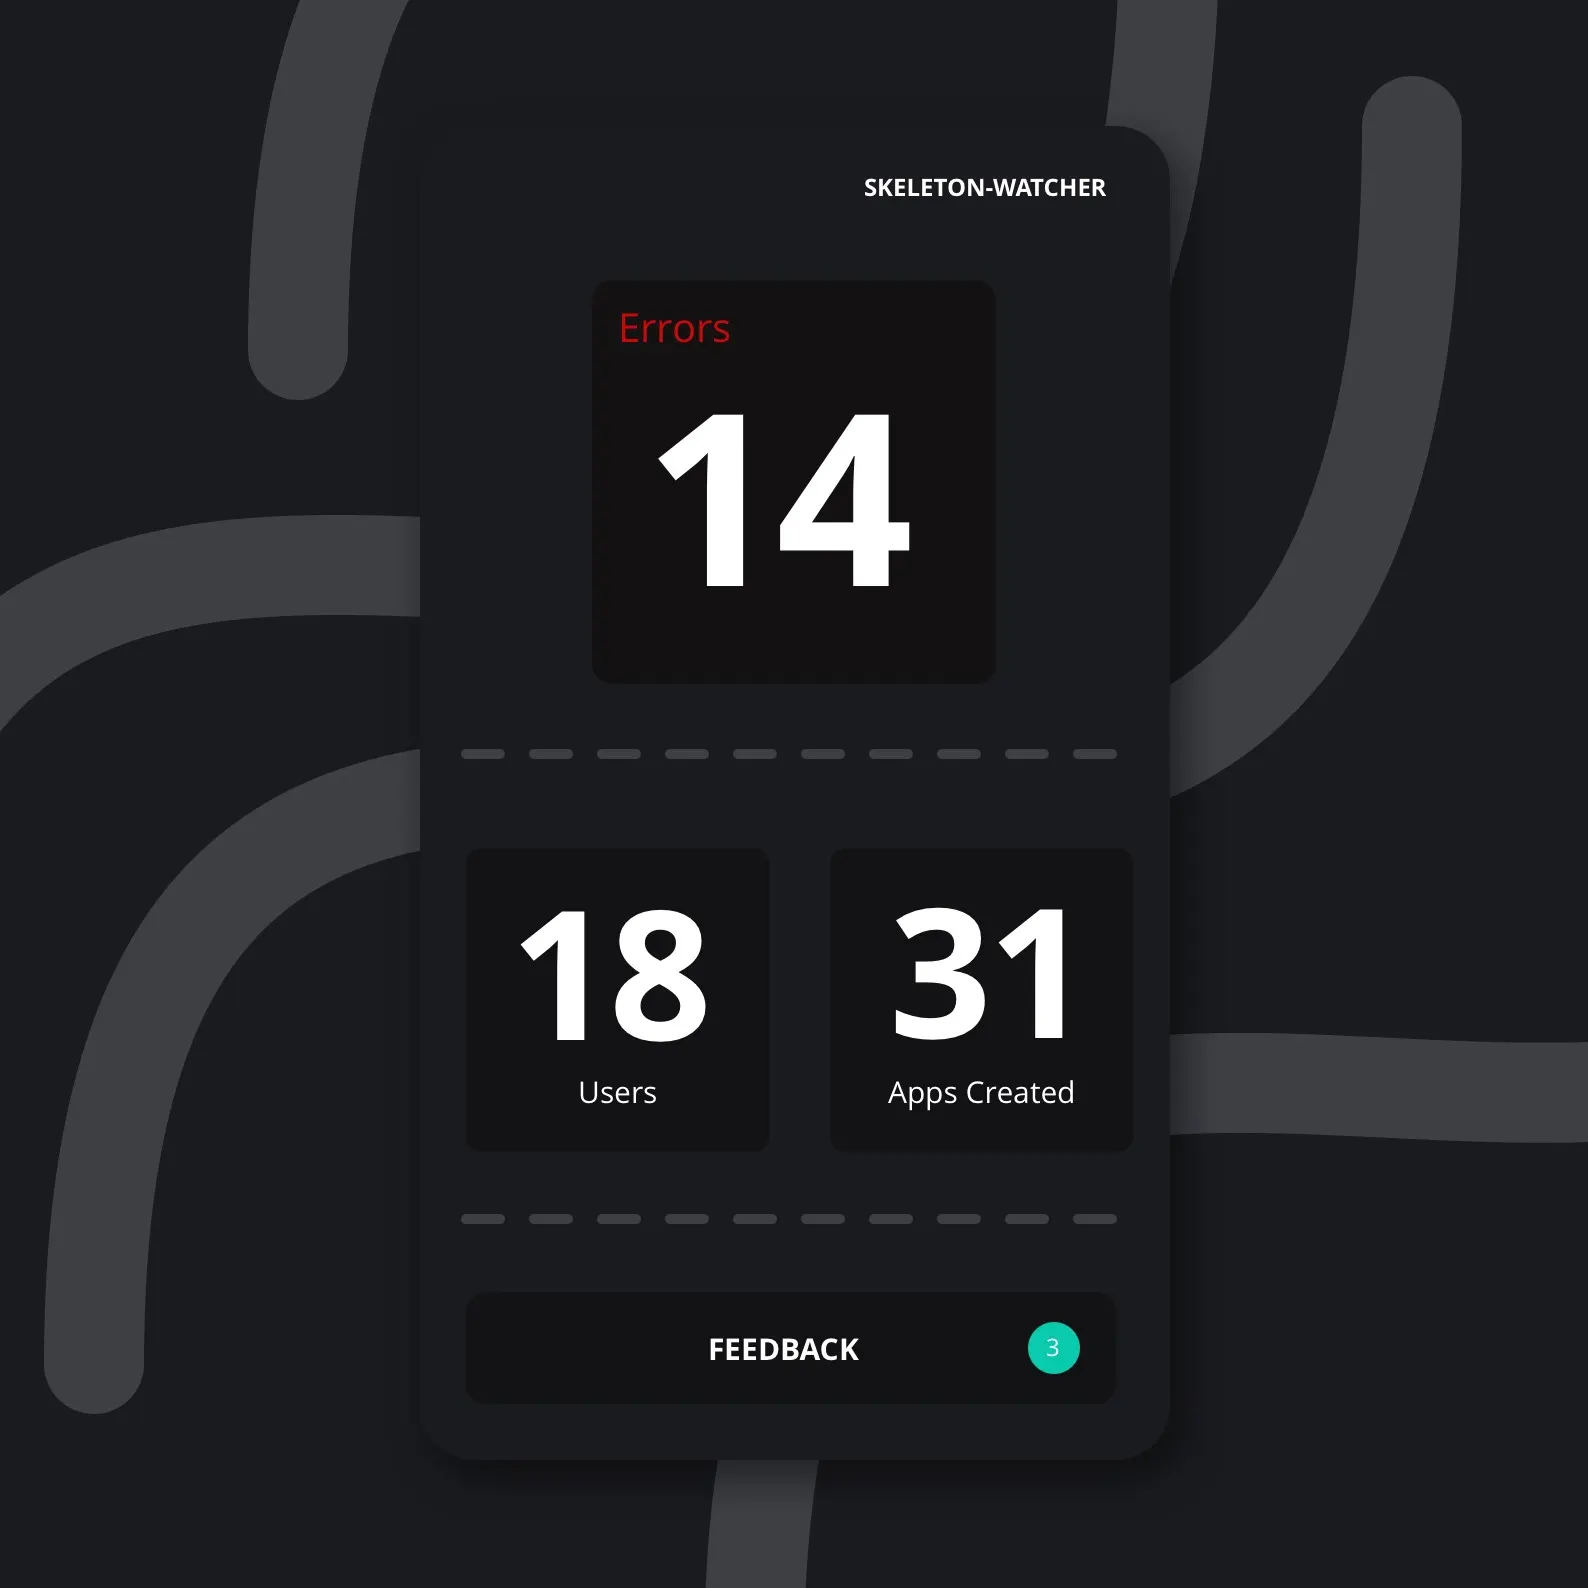
I’ve created the widgets for the stats counter, the feedback button with the notification on it and the toolbar with the right aligned text. Below is the code for all the widgets. Create new files under the widgets folder in UI and paste the following code in there.
Stats Counter Widget
import 'package:flutter/material.dart';
import 'package:skeleton_watcher/ui/shared/app_colors.dart';

class StatsCounter extends StatelessWidget {
  final double size;
  final int count;
  final String title;
  final Color titleColor;

  StatsCounter(
      {@required this.size, @required this.count, @required this.title, this.titleColor = Colors.white});

  @override
  Widget build(BuildContext context) {
    return Container(
      width: size,
      height: size,
      decoration: BoxDecoration(
          borderRadius: BorderRadius.circular(5.0), color: darkGrey),
      child: Column(
          mainAxisSize: MainAxisSize.min,
          crossAxisAlignment: CrossAxisAlignment.center,
          children: <Widget>[
            Text(count.toString(),
                textAlign: TextAlign.center,
                style: TextStyle(fontSize: size  *0.6, fontWeight: FontWeight.w800)),
            Text(title,
                textAlign: TextAlign.center,
                style: TextStyle(
                  color: titleColor,
                  fontSize: size * 0.1, fontWeight: FontWeight.w400))
          ]),
    );
  }
}
Indicator Button
import 'package:flutter/material.dart';
import 'package:skeleton_watcher/ui/shared/app_colors.dart';

class IndicatorButton extends StatelessWidget {
  final double height;
  final String title;
  final Function onTap;
  final int indicationCount;

  const IndicatorButton({this.height = 50.0, this.title, this.onTap, this.indicationCount});

  bool get hasIndication => indicationCount != null && indicationCount > 0;

  @override
  Widget build(BuildContext context) {
    return GestureDetector(
      onTap: onTap,
      child: Container(
        height: height,
        child: Stack(children: [
        Container(
            height: height,
            width: double.infinity,
            alignment: Alignment.center,
            decoration: BoxDecoration(
                borderRadius: BorderRadius.circular(10.0), color: primaryColor),
            child: Text(
              title,
              style: TextStyle(fontSize: 16, fontWeight: FontWeight.w700),
            )),
        hasIndication ? Positioned(
          top: 10,
          right: 20.0,
          child: Container(
            width: 30,
            height: 30,
            alignment: Alignment.center,
            decoration:
                ShapeDecoration(shape: CircleBorder(), color: darkGrey),
            child: Text(indicationCount.toString(),
                style: TextStyle(fontSize: 14, fontWeight: FontWeight.w400)),
          ),
        ) : Container()
      ]),
    ));
  }
}
Watcher Toolbar
import 'package:flutter/material.dart';

const double toolbarHeight = 80.0;

class WatcherToolbar extends StatelessWidget {
  final String title;
  final bool showBackButton;
  const WatcherToolbar({@required this.title, this.showBackButton = false});

  @override
  Widget build(BuildContext context) {
    return Container(
      height: toolbarHeight,
      margin: EdgeInsets.symmetric(horizontal: 20.0),
      child: Row(
        children: <Widget>[
          showBackButton
              ? GestureDetector(
                  onTap: () {
                    Navigator.pop(context);
                  },
                  child: Container(
                      alignment: Alignment.centerLeft,
                      width: 50,
                      child: Icon(Icons.chevron_left,
                          size: 30, color: Colors.white)),
                )
              : Container(),
          Expanded(
            child: Text(title,
                textAlign: TextAlign.right,
                style: TextStyle(fontWeight: FontWeight.w800)),
          ),
        ],
      ),
    );
  }
}
All we’ll focus on is binding the UI to the model data. In the HomeView Create a function called _getStatsUi that takes the model and context and returns a Widget. The app UI can be divided into the following sections.
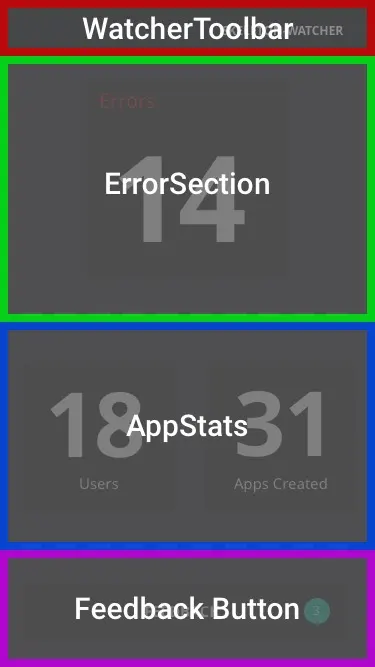
We’ll use a column for the root widget to stack the layout. Each child will have a fixed width. The stats counter and the feedback button will be in a fixed width container with the items centered.
Add the _getStatsUi function and return a Column as the main widget.
Widget _getStatsUi(HomeViewModel model, BuildContext context) {
  return Column(
    children:[

    ]
  );
}
The first child will be our Toolbar watcher and the rest will be our Fixed height Containers. The first container will take half of the size of the screen (after toolbar height is deducted), the second one will take a a third of the size and the last one will take a 6th of the size. The _getHeightContainer will also have the option to add a stroke to the top part of the container. Add the const decoration to the top of the class and your function. I decided not to add the stroke since I wanted a dash and not a solid line
static const BoxDecoration topLineBorderDecoration = BoxDecoration(
      border: Border(
          top: BorderSide(
              color: lightGrey, style: BorderStyle.solid, width: 5.0)));

...

Widget _getHeightContainer(
      {double height,
      BuildContext context,
      Widget child,
      bool hasTopStroke = false}) {
    return Container(
        height: height,
        alignment: Alignment.center,
        margin: EdgeInsets.symmetric(horizontal: 20.0),
        decoration: hasTopStroke? topLineBorderDecoration : null,
        child: child);
  }
Add the children in the order described using a row for the double counter in one section. Your _getStatsUI function should look like this.
Widget _getStatsUi(HomeViewModel model, BuildContext context) {
    return Column(
      mainAxisSize: MainAxisSize.min,
      children: [
        WatcherToolbar(title: 'SKELETON-WATCHER'),
        _getHeightContainer(
          context: context,
          height:
              screenHeight(context, dividedBy: 2, decreasedBy: toolbarHeight),
          child: StatsCounter(
            size: screenHeight(context,
                    dividedBy: 2, decreasedBy: toolbarHeight) -
                60,
            count: model.appStats.errorCount,
            title: 'Errors',
            titleColor: Colors.red,
          ),
        ),
        _getHeightContainer(
          context: context,
          height:screenHeight(context, dividedBy: 3, decreasedBy: toolbarHeight),
          child: Row(
            mainAxisSize: MainAxisSize.max,
            mainAxisAlignment: MainAxisAlignment.spaceEvenly,
            children: <Widget>[
              StatsCounter(
                size: screenHeight(context, dividedBy: 3, decreasedBy: toolbarHeight) - 60,
                count: model.appStats.userCount,
                title: 'Users',
              ),
              StatsCounter(
                size: screenHeight(context,dividedBy: 3, decreasedBy: toolbarHeight) - 60,
                count: model.appStats.appCount,
                title: 'Apps Created',
              )
            ],
          ),
        ),
        _getHeightContainer(
            height: screenHeight(context, dividedBy: 6, decreasedBy: toolbarHeight),
            child: IndicatorButton(
              title: 'FEEDBACK',
              onTap: () {
                Navigator.push(context,
                    MaterialPageRoute(builder: (context) => FeedbackView()));
              }
            ))
      ],
    );
  }
If you run this you should now see the hove UI hooked up to the model appStats
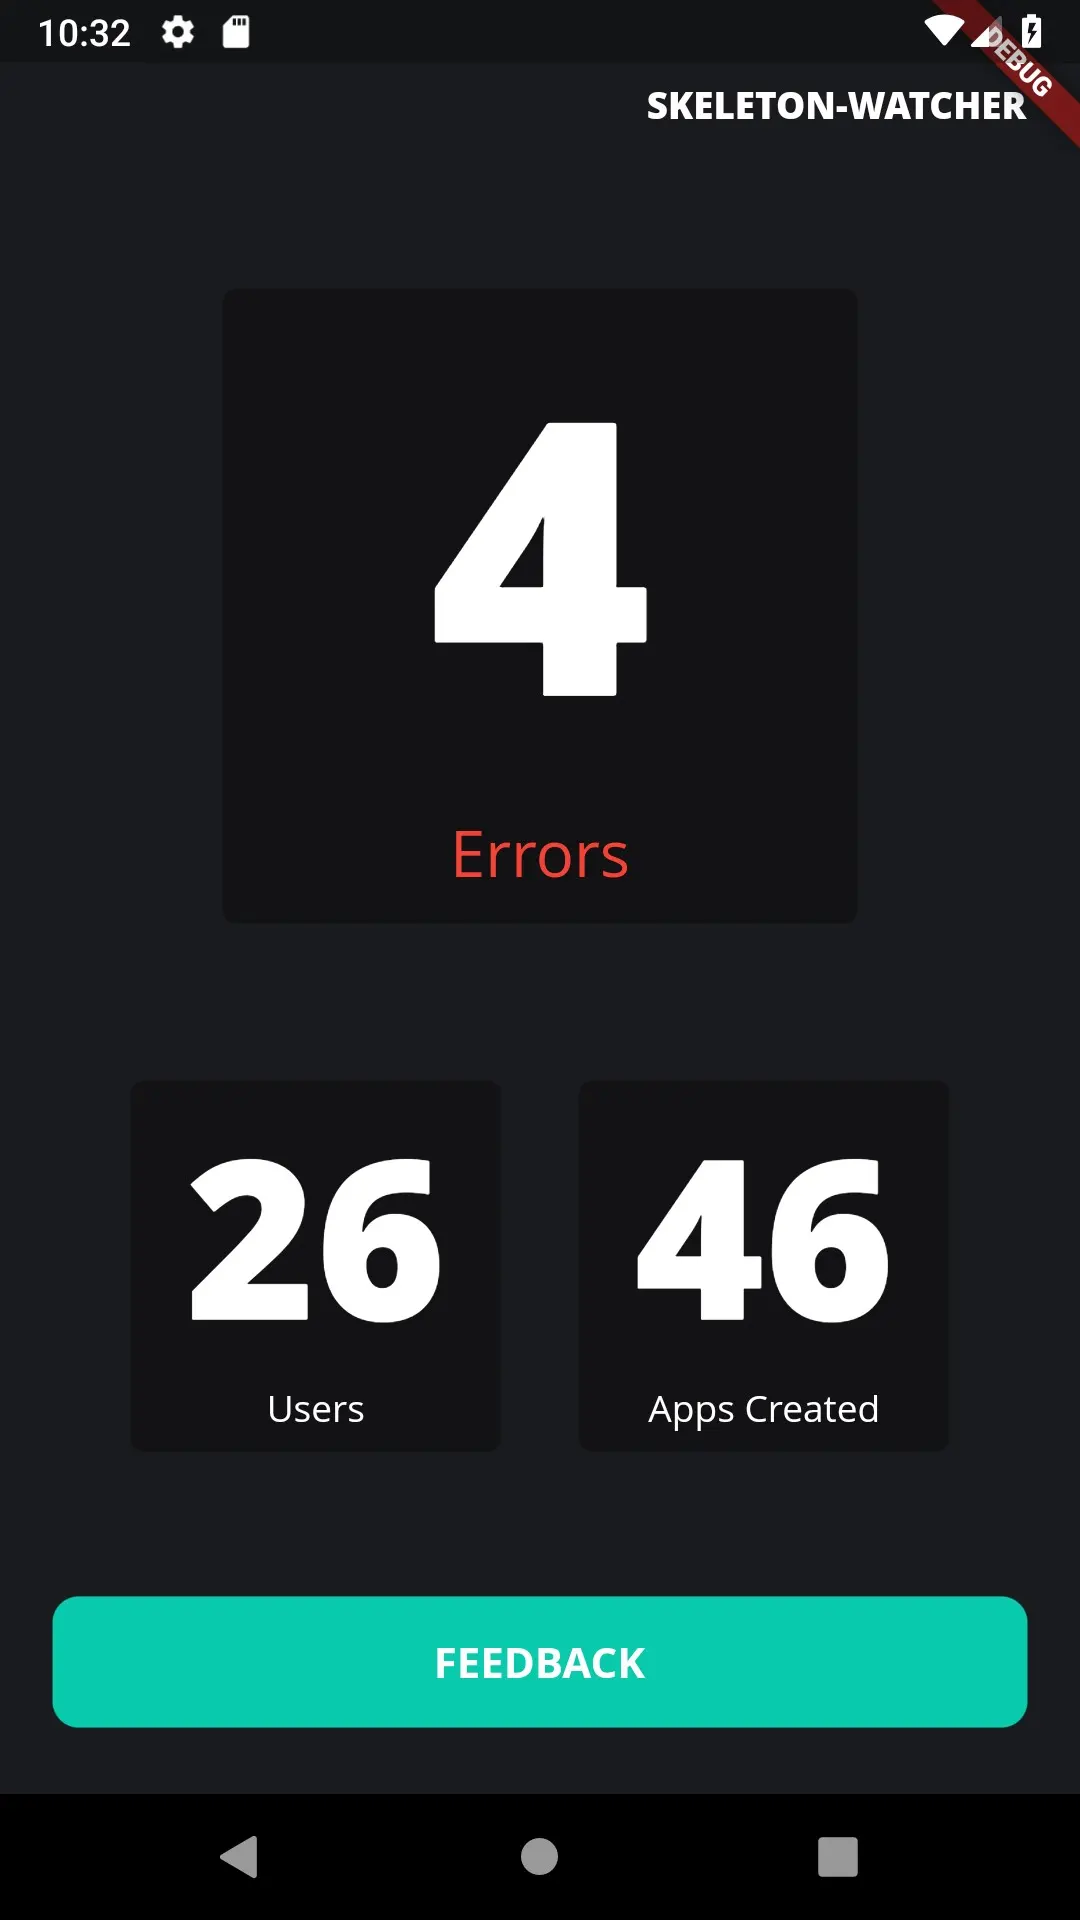
And that’s it. If you check the video tutorial you’ll see an example of how it updates in real time when I change the firestore values. Pretty cool.
Navigating to the feedback view should show you the default feedback list. The feedback collection has been added to the Firestore database but has not been implemented in the App. Once it’s implemented I’ll make part 2 of this guide showing how to handle real time feedback updates and marking items as read or closed from the app. Until next time.