In this tutorial we will go over the current practice when creating end-to-end tests using TestSweets.
Test Structure
Tests are organized in Test Suite, Test Cases and Test Steps. Lets cover their definitions first before doing any scripting.
Test Suite
A Test Suite (you see where we got our name 🤓 ?) is a collection of Test Cases. A Test Suite covers a particular Feature of an application, or if you don’t know how to classify that, it’s a single piece of functionality that the user can use. Lets go over a few examples to help the idea sink in.
Examples
Authentication
A common Test Suite, which all apps we work on has is Authentication. This would contain all the Test Cases that cover anything in relation to authentication.
- Can the user login?
- What happens when the user enters the wrong email?
- What happens when the user enters the wrong password?
- Can a user reset their password?
- Can a user log out once they’ve logged in?
- Can a user change their password from within the app?
- …
Anything to do with Authenticating the users account and their details. Each of the questions above would be answered with its own Test Case (More on this later).
Order Placement
This would only be in a mobile app where you can place orders. But this would cover everything relating to order placement. (We keep checkout separate from this, you can do it either way)
- Can a user add items to their cart?
- Can a user add multiple items to their cart?
- Can a user selection multiple options
- Can a user increase their quantity
- Can a user continue to checkout with their cart
Philosophy
The examples above is just to give you some idea of how we recommend you split up your Test Suites. If you are a tester or have experience testing your own software you can use your own definition of what should be a test suite. The one thing to mention is that this will not be written like manual test cases that are over verbose.
Each TestSuite SHOULD assume that it’s at the correct place to start running, meaning after authentication, the next TestSuite shouldn’t also have to login. The way we’re building TestSweets is to make sure you write your tests the way that a user would use the app. This way we get a real world-like experience from our test results. The big thing to take away from this tutorial is
”Test Suites should assume the app is in the correct place they need to start their tests”. At the moment TestSuites run in a linear fashion, one after the other. The same goes for Test Cases. Speaking of …
Test Cases
A Test Case is a single set of Test Steps and a collection of Test Cases make up a Test Suite. Each Test Case answers a single question, if it’s a short answer we don’t mind having a Test Case that answers more than one question. Let me give you an example.
Examples
Lets take the question above in Authentication “Can the user login?“. This is a basic Test Case and would require a few steps
- Launch the app
- Wait for login view
- Enter details
- Login
That’s quite a short test case, some people feel uncomfortable with that. I don’t particularly feel anything towards the length, but if you do then you can bundle it with the other question. “Can the user logout?“. So we add the additional steps
- Tap Profile bottom item
- Tap Logout option
- Tap yes
Now the app is back in the same place on the login view. Which means you can now write your verification Test Case to check your wrong password / email scenarios.
Philosophy
The same as the Test Suites, currently the Test Cases run in a linear fashion, one after the other in the order they show in TestSweets. This means that each Test Case SHOULD assume that it’s starting at the correct place to execute its first Test Step without Failure. And each Test Case SHOULD leave the app at the point where they can ensure their next Test Case will execute as expected. This means if you’re Test Case logs out of the app and stops there, the next Test Case should assume you are logged out and login in from there, or do whatever it has to, in the logged out state. The last thing to cover is the Test Steps
Test Steps
A Test Step is the actual command that’s executed on the device. We have a few of them but today we’ll cover the basics, the ones we’ll use most of the time.
- Fresh Install: This command installs the app you’re testing onto the device and ensures all local cache is cleared as well so it’s always a fresh install
- Open Application: This command has to be called in your first Test Case to ensure the app is open
- Wait For
ViewName: This command will pause the test runner until the view that it’s waiting for is rendered on the screen. We use this to ensure we wait for a specific view before executing any commands that expect that view on the screen. - Tap
touchableAutomationPointName: This command performs a tap on the automation point you have defined using the touchable type - Input
inputPointNameinputValue: This command enters the text from the third word into the input field that you defined using theinputtype. - Scroll
scrollPointNameleft100: This command will perform a scroll on the scroll automation point you defined and will scroll left by 100 pixels. - Expect text
textToLookFor: This command will check on the current view if it can find the text matching the third word in the command. - In: Changes view context to make sure you’re on the correct view
Most of the test cases you have will consist of these Test Steps. To see the full list you should go to the documentation and see what else there is available.
Scripting in TestSweets
Now that we know the structure of our tests we can go ahead and write our end-to-end automation testing for our Example app. Like mentioned in the previous tutorial the flow we want is:
- Login→Scroll the lists around→Go to last tab→Tap floating action button 3 times → check if we have todo 2 on screen
That’s all we want. We’ll split that into 2 Test Suites just to show how we organize those. We’ll have Authentication which will login the user, then we’ll have a Functionality suite ****which will scroll the lists, go to the next tab and then tap on the todo button 8 times and check for the correct result. Lets get started.
Creating Tests
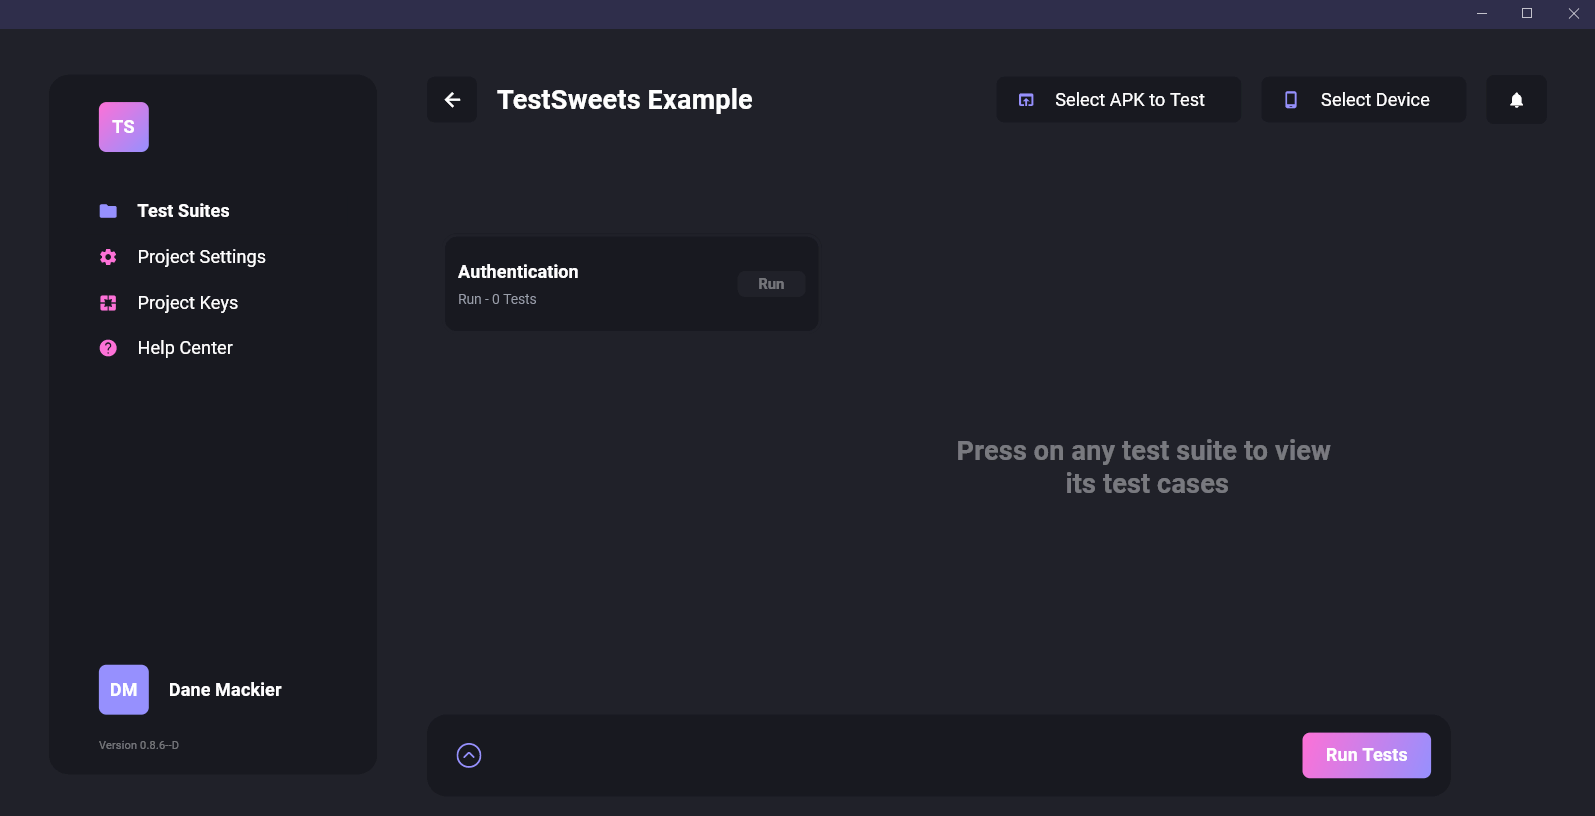
Open up TestSweets and select your project. You’ll see this empty state.
If your project is still open from the previous tutorial click the back button in the top left next to your project name and open the project again. This is to load the automation data that has been captured since you opened the project 😥 we’ll get that real time soon.
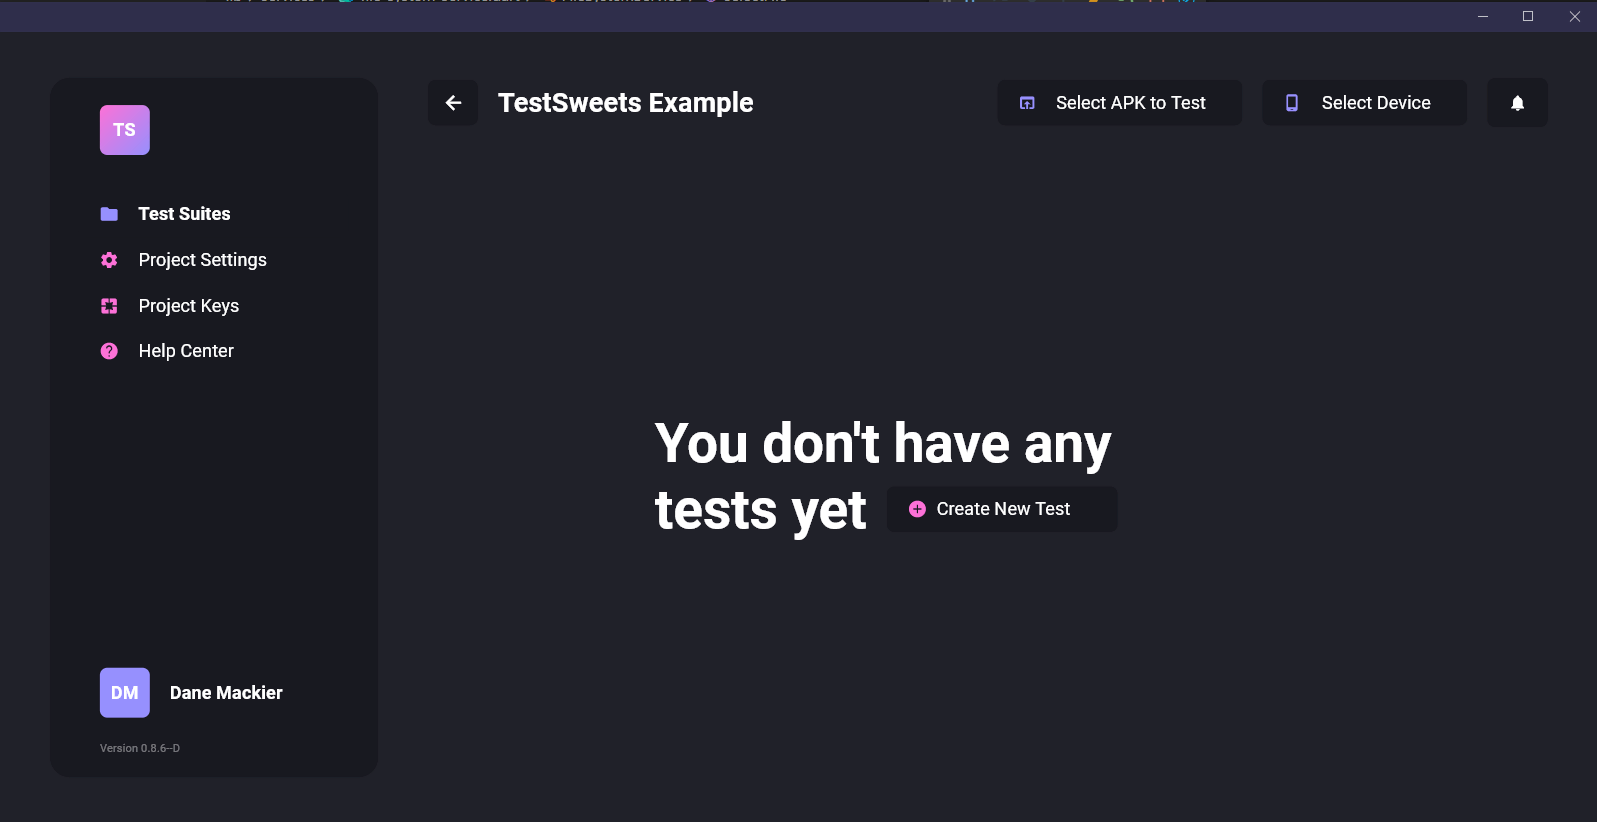
When you click on the “Create New Test” button you’ll see a dialog where you can enter your Test Suite name and description. I’ll call mine Authentication and give it the description “Validate all authentication behaviour for the user”. Once created you’ll see your empty Test Suite appear.
If you click on the Test Suite you will see a plus sign appear. You can click on that and you’ll get the Test Case Editor on the right hand side.
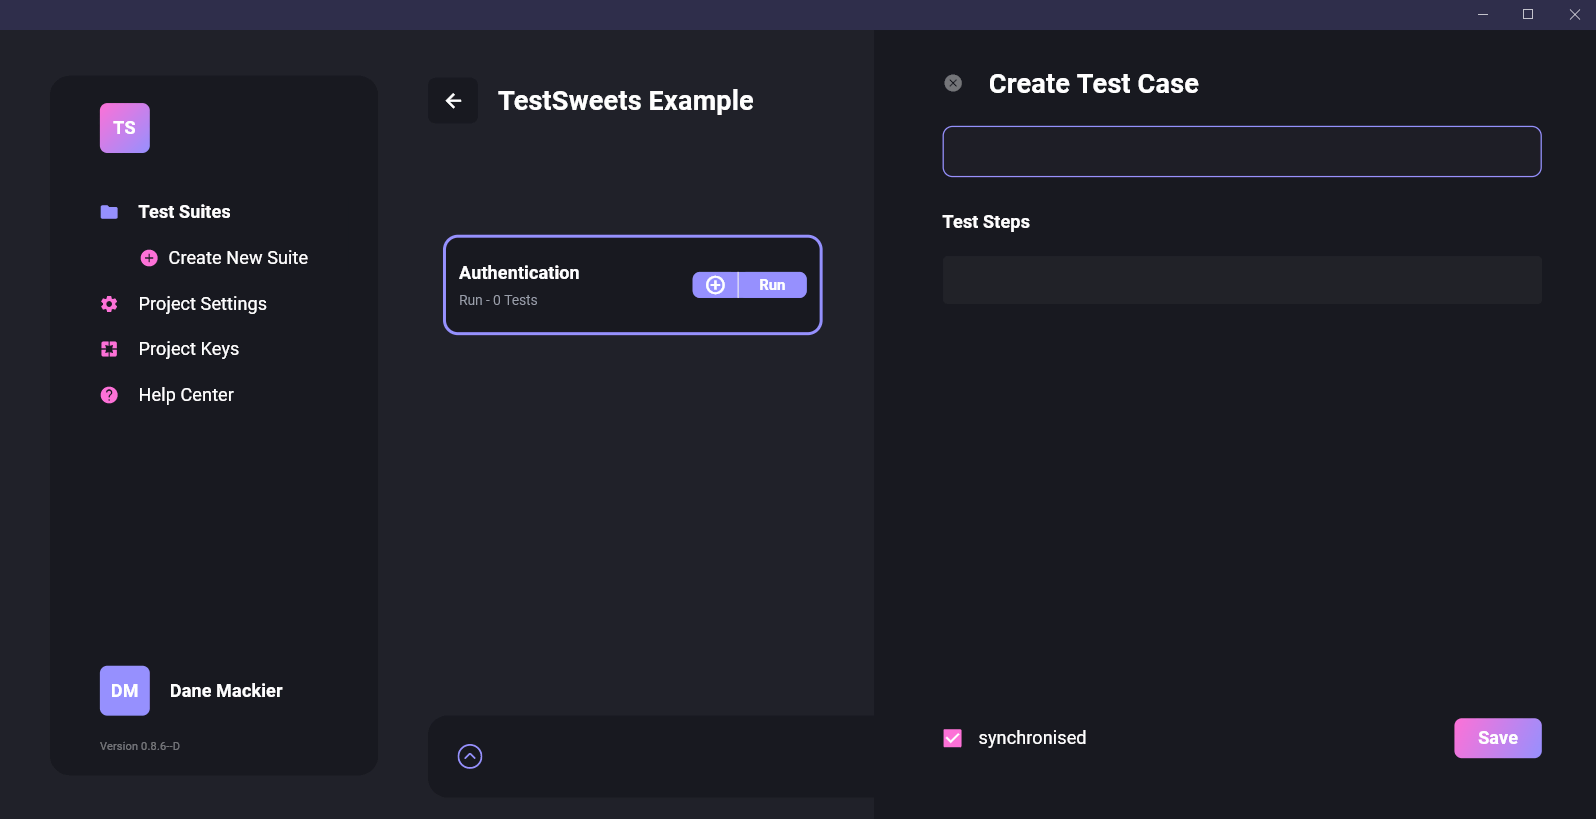
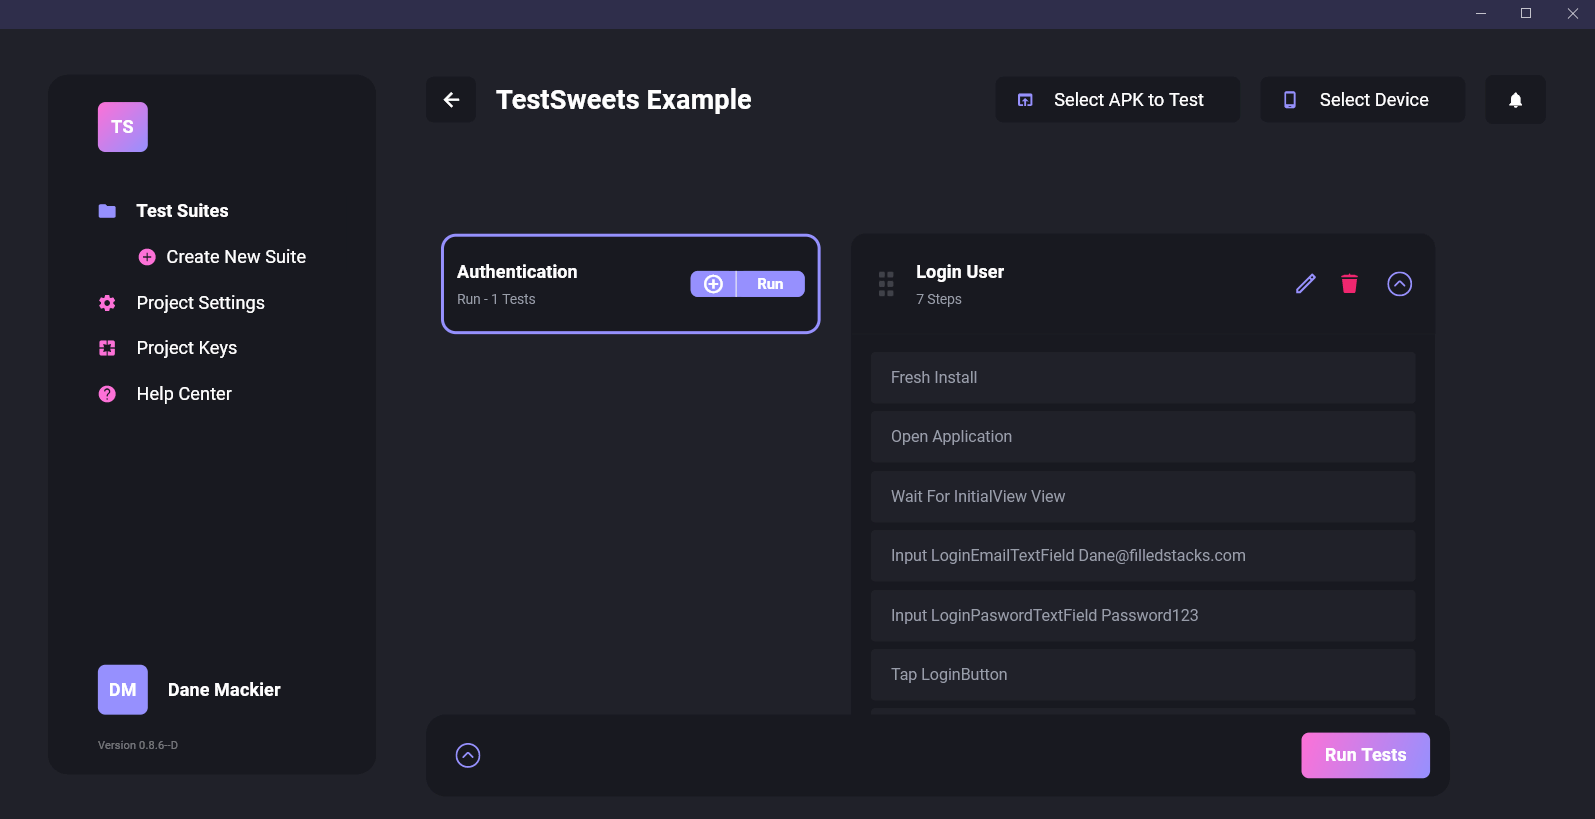
I’ll enter “Login User” as my title. Then for the steps I will do the following:
- Fresh Install - This will install the app on the device
- Open Application - This will open the app
- Wait for initialView view - This tells the test runner to wait for the initial view before it continues
- Input loginEmailTextField dane@filledstacks.com - This tells the Test runner to enter
dane@filledstacks.cominto theloginEmailTextField - Input loginPaswordTextField password123 - This tells the Test runner to enter
password123into theloginPaswordTextField - Tap loginButton - This tells the Test runner to tap the
loginButton
If you then tap save and open your Test Case it should look like this
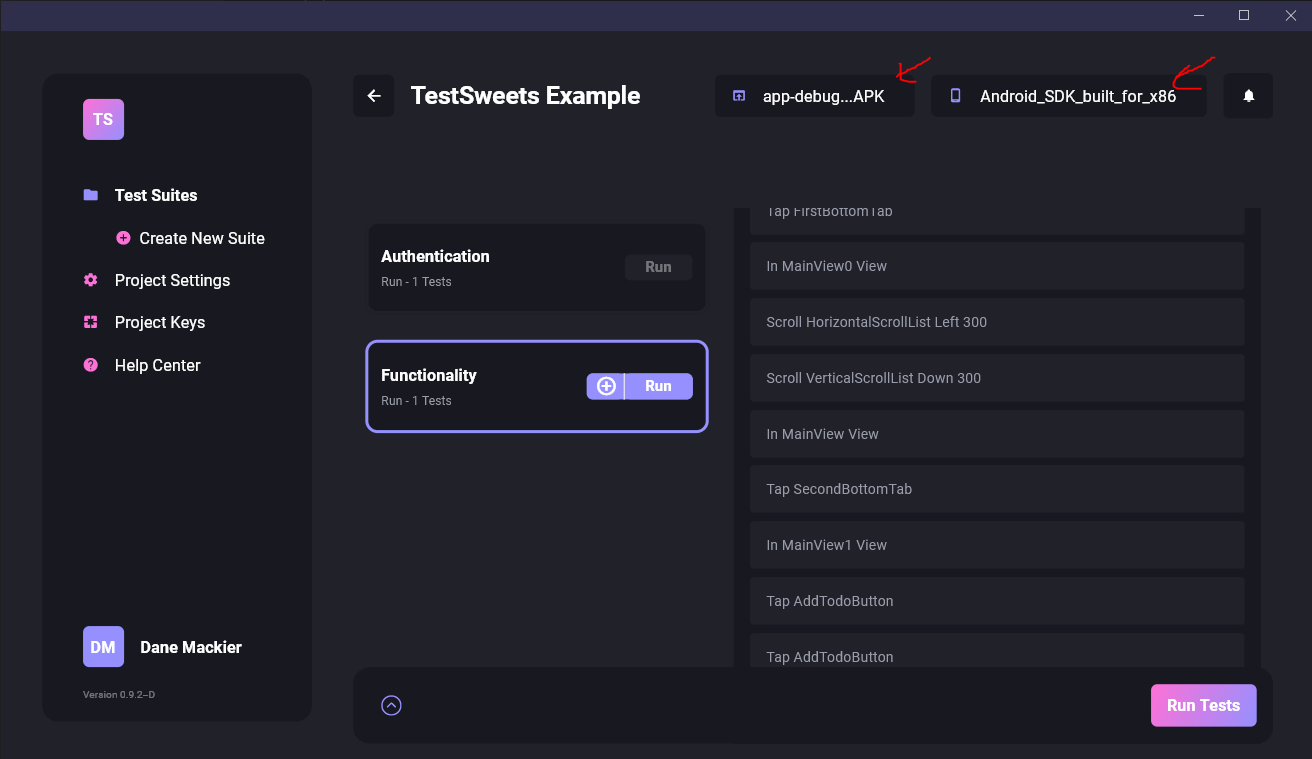
The authentication test case is complete so now we can write our other test case. Functionality. In the left hand toolbar you can see “Create New Suite”. We will click on that then fill in “Functionality” as the title and “Testing the functionality of the app” as the description. The first test case we’ll call “Browse and Todo adding” and the steps will be as follows:
- Wait for mainView0 view - This will wait until the mainView0 is on screen after login
- Scroll HorizontalScrollList Left 300 - This will scroll the horizontal scroll list left by 300
- Scroll VerticalScrollList Up 300 - This will scroll the vertical list up by 300
- Tap SecondButtonTab - This will tap the bottom nav tab and swap the view over to the Todo view
- Tap AddTodoButton - This will tap on the add todo button which adds a new todo with the tap count behind it
- Repeat the above command twice
- Expect Text “Todo 2” - This will check on the current UI if there’s any text matching “Todo 2” on screen
And that’s it for our scripting. It’s going to be as easy as that. What did that take, less than 3 minutes? Not only will this save a lot of testing hours but also a lot of hours maintaining and creating these tests.
Running a Test
Now it’s time for the magic! Lets run our test. To do this we need 2 things.
- Point the application to the APK that we want to run which means we need an apk.
- Select a device to run on, which means we need a device to run it on
Lets start off with the APK we need.
Creating a Build for TestSweets
The first thing we need to do is in code, we have to turn the capture mode off and enable Flutter driver as well. We start by adding flutter_driver to our app.
dependencies:
  flutter_driver:
    sdk: flutter
Then we update our main.dart file. We want to first read an environment variable called DRIVE_MODE this will tell us whether we should be capturing or be in drive mode. When in drive mode TestSweets can interact with the application.
import 'package:flutter_driver/driver_extension.dart';

const bool DRIVE_MODE = bool.fromEnvironment(
  'DRIVE_MODE',
  defaultValue: false,
);

Future<void> main() async {
	// Enable Flutter Driver when Drive Mode is true
  if (DRIVE_MODE) {
    enableFlutterDriverExtension();
  }

  setupLocator();
  await setupTestSweets();
  runApp(MyApp());
}

class MyApp extends StatelessWidget {
  @override
  Widget build(BuildContext context) {
    return MaterialApp(
      title: 'Flutter Demo',
      builder: (context, child) => TestSweetsOverlayView(
        projectId: 'EEBojwAB65X5OgHRqwPT',
        child: child!,
        captureWidgets: !DRIVE_MODE, // <=== Don't capture widgets when in drive mode
      ),
			...
  }
}
Then what we can do next is create an apk with DRIVE_MODE enabled by running the following command.
flutter build apk --debug --dart-define=DRIVE_MODE=trueWhen completed you’ll get the path of your apk. Click on the “Select App” button in the top right section of the app and select your apk from above. Then make sure you have an Android device plugged in or an emulator started. Click on “Select Device” and select the one you want to run on.
And the last step is to click on “Run Tests” and sit back. If you’re stuck or this is not happening for you, please come over to the slack, join our testsweets early beta channel and lets have a chat! We’ll make sure you get somewhere with your automated end-to-end testing.