If you followed my previous architecture guide, you’ll see that I use a mix of Provider and get_it for my application architecture. The reasons for that were as follows.
- Injecting / Retrieving dependencies where the
BuildContextis not available is(was) difficult - The code for Dependency Injection using Provider only has more boiler plate associated with it
- The Dependency injection code for Provider only is aware of where injections are happening and requires you to update signatures of constructors or the Provider code manually (can be good and can be bad)
Those three things I can sum up by saying get_it is easier to implement, maintain and understand. Recently a new version of Provider was released (v3) which introduces something called a ProxyProvider. ProxyProvider is a provider that builds a value based on other providers. This means you can now inject providers into other provided values. In this tutorial we will build the same app that we did with my original architecture setup, the only difference is there will be no get_it 😒.
Architecture overview
Before we start I want to outline the things that I’d like this architecture to accomplish outside of the basics like, maintainable, easy to understand, well separated etc. Here’s some of the things to keep in mind while developing using this architecture.
- Every “group”/“collection” of widgets that relies on logic will be made into it’s own widget with it’s own ViewModel.
- If a view has a Model the only purpose of that model will be to show different states of the view UI. Another way to look at this is by saying. A view shouldn’t re-render if a small change has occurred that doesn’t affect the entire view. If it does then you have to pull that UI that changes into it’s own widgets with it’s own model.
- No business logic in the UI (file). I consider the UI being the file that defines the Widgets and layout. The ViewModel is not part of the UI
- All logic and state mangement happens in the ViewModel
- The ViewModel will not implement any specific functionality. Instead it will make use of dedicated services that group functionality together based on the app’s requirements. We’ll use the Single Responsibility Principle to a moderate degree here.
Single Responsibility will be used for defining services, but not the way some people have misused it. We’ll do it based on this quote from Robert Martin.
”Gather together the things that change for the same reasons. Separate those things that change for different reasons.”
- Create dedicated services to do all the actual work based on what’s said above
- Models will reduce state based on information in the shared service
That’s it for things to keep in mind. You can download the starting project zip here, or clone my entire awesome tutorials repo here and follow along with tutorial 014. This project has some basic things setup, so we don’t focus on anything outside of the architecture. Some of the things already setup is:
- Colors and text styles for the app
- Api class to get and serialise API data from jsonPlaceholder
- Authentication service which has a user controller and uses the API to perform a “login”
- The data models the API serialises into
- Empty Home, Login and Post View
- Widget UI for LoginHeader (text and input field), PostListItem (container with gesture detector) and Comments (empty, but also defines a Comment list item)
- Router setup for named routing like this
Implementation
Lets start by adding the new Provider package
provider: ^3.0.0Then straight into it.
Dependency Injection Setup
Using the MultiProvider and the ProxyProvider we’ll do all of our Service classes injections. To start we’ll wrap the MaterialApp with a MultiProvider and give it a empty list of providers for now.
import 'package:provider/provider.dart';

...

  @override
  Widget build(BuildContext context) {
    return MultiProvider(
      providers: [],
      child: MaterialApp(
        title: 'Flutter Demo',
        theme: ThemeData(
          primarySwatch: Colors.blue,
        ),
        initialRoute: RoutePaths.Login,
        onGenerateRoute: Router.generateRoute,
      ),
    );
  }
Then we’ll create a new file in root of lib called provider_setup.dart. Let’s go over some basic things you have to know to effectively perform dependency injection at this point.
- You can only inject a service that has already been supplied as a Provider
- The order of registration matters!
With that said we’ll have specific lists for each of our providers to make it clear when they are registered and where they are provided (in the case of UI consumed providers). These are the lists we’ll have:
- providers: All the providers for the entire app
- independentServices: These are classes/objects that do not depend on any other services to execute their logic
- dependentServices: These are classes/object that depend on previously registered services
- uiConsumableProviders: These are values that you want to consume directly in the UI. You can add values here if you would have to introduce a property on most, if not all your models just to get the data out. In our case the user information. If we don’t provide it here then all the models will have a user property on it. You could also just add it to the BaseModel, but I digress.
That’s it for the setup, and this is how it will look in code.
// provider_setup.dart
import 'package:provider/provider.dart';

List<SingleChildCloneableWidget> providers = [
  ...independentServices,
  ...dependentServices,
  ...uiConsumableProviders,
];

List<SingleChildCloneableWidget> independentServices = [];

List<SingleChildCloneableWidget> dependentServices = [];

List<SingleChildCloneableWidget> uiConsumableProviders = [];
Cool right. Imagine if we didn’t have the spread operator. Things would have been messy, still doable. We would have just used the builder pattern to add everything and return the final result. Now in the main file we can provide all of our Providers.
MultiProvider(
      providers: providers,
      child: MaterialApp(...),
)
Dependency Injection Implementation
Now lets register our services and make use of the ProxyProvider. First we’ll register the Api in the independenyServices.
List<SingleChildCloneableWidget> independentServices = [
  Provider.value(value: Api())
];
Then we’ll register the AuthenticationService as a dependent service using the ProxyProvider. ProxyProvider allows your to specify what type of Provider your new one depends on and provides it to you through the builder function. We’ll ask for the Api (first type parameter), and the return type will be an AuthenticationService. In the builder body we will then inject that returned Api into the service and return the service.
List<SingleChildCloneableWidget> dependentServices = [
  ProxyProvider<Api, AuthenticationService>(
    builder: (context, api, authenticationService) =>
        AuthenticationService(api: api),
  )
];
That’s it for injecting the AuthenticationService with it’s API dependency.
ViewModels and Injetion
To clear some questions around naming (that I personally had), I’m calling my folder viewmodel because it’s the model that the view depends on. I tried calling it Notifiers in code but I kept catching myself speaking of it as a ViewModel. You can call it Models or whatever you prefer.
Implementing a ViewModel
As mentioned earlier, if a widget has logic it will have it’s own model. The naming convention for that will be [widgetName]_model.dart and the same for the class WidgetNameModel. Let’s implement the Login View so you can see how that will look. The loginView will contain the login logic so we’ll create a LoginViewModel to go with it. Under the code folder create a new folder called viewmodels, in there create another folder called views, then create a login_view_model.dart. This model will depend on the AuthenticationService that we have, and will have 1 function called login that takes in a String returns a boolean.
class LoginViewModel extends ChangeNotifier {
  AuthenticationService _authenticationService;

  LoginViewModel({ @required AuthenticationService authenticationService})
      : _authenticationService = authenticationService;

  Future<bool> login(String userIdText) async {
  }
}
The only thing this model will do is, parse the userId to an int then call login on the AuthenticationService and return the response. We also want to indicate that it’s busy at the moment so we’ll use a boolean for that this time around. We’ll first add the busy code and wrap the setting of it in a function so we can notifyListeners when it has changed.
bool _busy = false;
bool get busy => _busy;

void setBusy(bool value) {
  _busy = value;
  notifyListeners();
}
Then we can implement the login function which will setBusy true, parse the text, call the authentication service to login and setBusy false when done.
Future<bool> login(String userIdText) async {
  setBusy(true);
  var userId = int.tryParse(userIdText);
  var success = await _authenticationService.login(userId);
  setBusy(false);
  return success;
}
Implementing a View
Now we can go on and create the LoginView. Go to the login_view.dart file under ui/views. We’ll start by wrapping the entire loginView (as an example, we’ll do more micro-models later) with a ChangeNotifierProvider and make the root child a consumer that returns our current UI. We’ll use the .value named constructor of the ChangeNotifierProiver to supply to notifier directly.
class LoginView extends StatelessWidget {
  @override
  Widget build(BuildContext context) {
    return ChangeNotifierProvider<LoginViewModel>.value(
      value: LoginViewModel(),
      child: Consumer<LoginViewModel>(
        builder: (context, model, child) => Scaffold(
            backgroundColor: backgroundColor,
            body: Center(child: Text('Login View'))),
      ),
    );
  }
}
And here comes the main part. How do we inject the AuthenticationService into the LoginViewModel. Well, we just request it from Provider.
ChangeNotifierProvider<LoginViewModel>.value(
  value: LoginViewModel(
      // Inject authentication service setup in the provider_setup
      authenticationService: Provider.of(context)
    ,),
...)
That’s it. Dart has some good type inference so there’s no need to provide the type as a generic argument. As long as your parameter has the type. It probably will because you want to hide the injected instances from any outside code calls. Now onto the basic UI. We’ll set the body as a column, the first child will be the LoginHeader widget and the second will be either the LoadingIndicator when busy, or the Login Button when not busy. Make your build method look like this.
 @override
  Widget build(BuildContext context) {
    return ChangeNotifierProvider<LoginViewModel>.value(
      value: LoginViewModel(authenticationService: Provider.of(context)),
      child: Consumer<LoginViewModel>(
        builder: (context, model, child) => Scaffold(
            backgroundColor: backgroundColor,
            body: Column(
              mainAxisAlignment: MainAxisAlignment.center,
              children: <Widget>[
                LoginHeader(controller: _controller),
                model.busy
                    ? CircularProgressIndicator()
                    : FlatButton(
                        color: Colors.white,
                        child: Text(
                          'Login',
                          style: TextStyle(color: Colors.black),
                        ),
                        onPressed: () {},
                      )
              ],
            ),
          ),
      ),
    );
  }
As you see we need the _controller to be added. To do that we’ll convert to a statefulWidget and then keep a TextEdittingController variable for the widgets to access. Put your cursor on the StatelessWidget class press Ctrl+Shift+R (Windows) / Alt+Shift+R (Mac) and select convert to Stateful widget. Then at the top of the state class add a text editting controller.
final TextEditingController _controller = TextEditingController();Last thing is to hook up the model call in the onPressed callback. We’ll call the loginModel, wait for success and then navigate when it’s complete .
...
 onPressed: () async {
    var loginSuccess = await model.login(_controller.text);
    if (loginSuccess) {
      Navigator.pushNamed(context, RoutePaths.Home);
    }
  },
...
Tutorial coming on how to navigate from the models
If you run the code now you can press the button and login. You’ll be navigated to the home view when done.
Further optimisation
If you’re concerned with all the UI being rebuilt when the model changes in this instance. The way you’ll build out your app in this setup is to provide any group of widgets that require logic and that can stand on it’s own with it’s own model. This way it will rebuild internally and update it’s UI without affecting the rest of the view. And additionally you can use the prebuilt child for UI that won’t change at all, like our LoginHeader. The Consumer widget allows you to supply a child that it will return to you through the builder. It’s quick change for a nice optimisation.
Consumer<LoginViewModel>(
  // Pass the login header as a prebuilt-static child
  child: LoginHeader(controller: _controller),
  builder: (context, model, child) => Scaffold(
    ...
    body: Column (

      children: [
        // Put the child in place of where the LohinHeader was
        child,
        ...
      ]
    )
Now we know for a fact that UI will not be rebuilt when the busy value changes 😄 Time for some architectural refactoring.
Sharing functionality and reducing boilerplate
BaseWidget implementation
First thing we know is that other widgets that require their own model will need to setup the ChangeNotifierProvider and it’s own Consumer with a specified type. We also know that we want to call some logic on startup in some views so we’ll build that into the BaseView as well. We’ll create a stateful widget called BaseWidget and it will be a generic class that extends ChangeNotifier.
import 'package:flutter/material.dart';

class BaseWidget<T extends ChangeNotifier> extends StatefulWidget {
  BaseWidget({Key key}) : super(key: key);

  _BaseWidgetState<T> createState() => _BaseWidgetState<T>();
}

class _BaseWidgetState<T extends ChangeNotifier> extends State<BaseWidget<T>> {
  @override
  Widget build(BuildContext context) {
    return Container(
    );
  }
}
Then we can use our code from the LoginView and put that in the build function. We’ll require a builder to provider to the consumer, a child widget for the consumer as well as the model itself. Which we’ll take in through the constructor.
class BaseWidget<T extends ChangeNotifier> extends StatefulWidget {
  final Widget Function(BuildContext context, T value, Widget child) builder;
  final T model;
  final Widget child;

  BaseWidget({Key key, this.model, this.builder, this.child}) : super(key: key);
  ...
}

class _BaseWidgetState<T extends ChangeNotifier> extends State<BaseWidget<T>> {
  // We want to store the instance of the model in the state
  // that way it stays constant through rebuilds
  T model;

  @override
  void initState() {
    // assign the model once when state is initialised
    model = widget.model;
    super.initState();
  }

  @override
  Widget build(BuildContext context) {
    return ChangeNotifierProvider<T>.value(
      value: model,
      child: Consumer<T>(
        builder: widget.builder,
        child: widget.child,
      ),
    );
  }
}
Now we can swap the Code in the Login View with a BaseWidget.
BaseWidget<LoginViewModel>(
      model: LoginViewModel(authenticationService: Provider.of(context)),
      child: LoginHeader(controller: _controller),
      builder: (context, model, child) => Scaffold(...),
);
BaseModel implementation
The only thing we want to share in the BaseModel is our busy code. In the viewmodels folder we’ll create a new file called base_model.dart, it will extend the ChangeNotifier and we’ll move all the busy code in there.
class BaseModel extends ChangeNotifier {
  bool _busy = false;
  bool get busy => _busy;

  void setBusy(bool value) {
    _busy = value;
    notifyListeners();
  }
}
Then in your LoginViewModel you can now extend form the BaseModel. That’s it for sharing model logic. Next up is the HomeView
Home View Implementation
To stress the importance of building widgets with it’s own model we’ll implement the HomeView without a model and we’ll hand responsibility of fetching posts to the Posts widget. This means the view will read as a highlevel document (as it should) and the widgets will internally take care of their own responsibility. We define the responsibility of the Posts widget as follows.
Given a user Id it fetches and displays posts.
That’s all it’ll do and having that small single responsibilty it’ll be able to actually be re-used in multiple places or multiple views. With Web and Desktop on the brink of being a reality this concept needs to stick in all our heads if we’re going to build maintainable multi platform products from one code base. And I’m saying that as a reminder to myself as well. Let’s define the basic UI for the HomeView. We want it to look like this

Injecting UI consumable streams
Since the HomeView doesn’t have a model but still requires the User name to be displayed we’ll add it as a uiConsumableProviders in our provider setup. We’ll inject the User stream so that we can consume it on any view that requires it. Since it depends on the AuthenticationService we’ll register a normal StreamProvider and get the AuthenticationService through the Provider.of call.
List<SingleChildCloneableWidget> uiConsumableProviders = [
  StreamProvider<User>(
    builder: (context) =>
        Provider.of<AuthenticationService>(context, listen: false).user,
  ),
];
This will only work with listen set to false because we’ll bypass the “need to update” all dependencies when a didChangeDependencies is invoked. If you don’t set listen to false this will not work.
Consuming the Stream in Home
Let’s build out the HomeView and consume the UserStream as well. The body will be a column, first child a large space, second will be a title with some padding that shows the username, third will some text and then the Posts that takes up the rest of the space.
  @override
  Widget build(BuildContext context) {
    return Scaffold(
      backgroundColor: backgroundColor,
      body: Column(
          crossAxisAlignment: CrossAxisAlignment.start,
          children: <Widget>[
            UIHelper.verticalSpaceLarge,
            Padding(
              padding: const EdgeInsets.only(left: 20.0),
              child: Text(
                'Welcome ${Provider.of<User>(context).name}',
                style: headerStyle,
              ),
            ),
            Padding(
              padding: const EdgeInsets.only(left: 20.0),
              child: Text('Here are all your posts', style: subHeaderStyle),
            ),
            UIHelper.verticalSpaceSmall,
            Expanded(child: Posts()),
          ],
        ),
    );
  }
The User object we’ll get from the stream using the Provider.of call and add the name into the Welcome text. There’s many other ways to provider the user (without a stream) but I want to show off the global UI consumable objects as well. Import everything and then we’ll build the Posts widget.
Building a widget with a single responsibility
The posts widget will be a stateless widget that has a basewidget as the root, it will have to request data when it’s initialised , show a busy indicator and render that list when the data is available. Under the ui/widgets folder create a new file called posts.dart
class Posts extends StatelessWidget {
  const Posts({Key key}) : super(key: key);

  @override
  Widget build(BuildContext context) {
    return BaseWidget<PostsModel>();
  }
}
We’ll give it a PostsModel. Under core/viewmodels create a new folder called widgets and in there create a file called posts_model.dart. This model will take in the Api as a dependency, have a lists of posts as a property and have a single function that takes in the userId and calls the api to fetch posts.
class PostsModel extends BaseModel {
  Api _api;

  PostsModel({
    @required Api api,
  }) : _api = api;

  List<Post> posts;

  Future getPosts(int userId) async {
    setBusy(true);
    posts = await _api.getPostsForUser(userId);
    setBusy(false);
  }
}
Now for the Posts widget, we want to call the getPosts function as soon as the model is ready. We’ll build that into the BaseWidget. We’ll pass in a callback function that takes the model as a parameter so we can execute logic on it when the widget has been initialised. In the BaseWidget add a new Function called onModelReady and pass it through the constructor. In the initState override we then want to check if the onModelReady function has been provided, if it’s available we’ll call it and pass through our model.
class BaseWidget<T extends ChangeNotifier> extends StatefulWidget {

final Function(T) onModelReady;
...

 BaseWidget({
   ...
    this.onModelReady,
  });
  ...
}

...

@override
void initState() {
  model = widget.model;

  if (widget.onModelReady != null) {
    widget.onModelReady(model);
  }

  super.initState();
}
Now in the posts view we can call this function and get the userId from the globally provided user object.
...
 @override
  Widget build(BuildContext context) {
    return BaseWidget<PostsModel>(
      model: PostsModel(api: Provider.of(context)),
      onModelReady: (model) => model.getPosts(Provider.of<User>(context).id),

    );
  }
And for the builder we will return a CircularProgressIndicator when the model is busy otherwise we’ll return a list view with PostListItems in it. your build method should look
@override
Widget build(BuildContext context) {
  return BaseWidget<PostsModel>(
    ...
    builder: (context, model, child) => model.busy
          ? Center(
              child: CircularProgressIndicator(),
            )
          : ListView.builder(
              itemCount: model.posts.length,
              itemBuilder: (context, index) => PostListItem(
                    post: model.posts[index],
                    onTap: () {
                      Navigator.pushNamed(
                        context,
                        RoutePaths.Post,
                        arguments: model.posts[index],
                      );
                    },
                  ),
            ));
}
If you go back to the HomeView and import the Posts widget then and you run you should see the posts being fetched. We’ve covered everything in the Architecture, so now we’ll just create the PostView that displays a post. The post view will look like this.
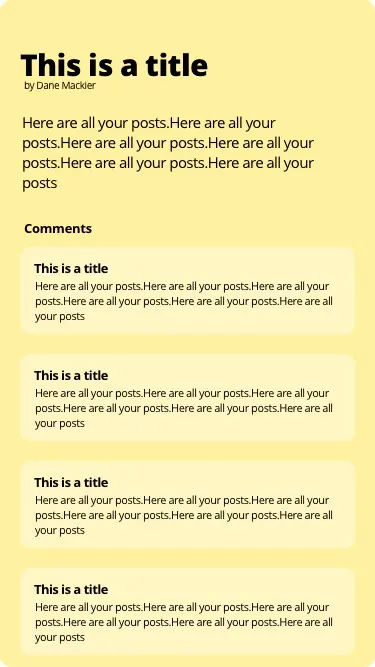
Very similar to the HomeView the PostView won’t have it’s own model. Instead we’ll build a Comments widget that will have the responsibility to fetch comments and display it given a postId. We’ll pass the basic post information through the constructor and use that to display the post content while the comments widget does it’s thing. In the post_view file make your body look like this. Nothing special, just basic UI, the only thing we need to build is the Comments widget.
class PostView extends StatelessWidget {
  final Post post;
  PostView({@required this.post});

  @override
  Widget build(BuildContext context) {
    return Scaffold(
      backgroundColor: backgroundColor,
      body: Padding(
        padding: const EdgeInsets.symmetric(horizontal: 20.0),
        child: Column(
          crossAxisAlignment: CrossAxisAlignment.start,
          children: <Widget>[
            UIHelper.verticalSpaceLarge,
            Text(post.title, style: headerStyle),
            Text(
              'by ${Provider.of<User>(context).name}',
              style: TextStyle(fontSize: 9.0),
            ),
            UIHelper.verticalSpaceMedium,
            Text(post.body),
            Comments(post.id)
          ],
        ),
      ),
    );
  }
}
Let’s add the widget and the model for the comments. We’ll start with the logic. Under viewmodels/widgets create a new file called comments_model.dart. The same as the Posts widget it contains a list property that will be set through a fetch Future, and it depends on the Api.
class CommentsModel extends BaseModel {
  Api _api;
  CommentsModel({@required Api api}) : _api = api;

  List<Comment> comments;

  Future fetchComments(int postId) async {
    setBusy(true);
    comments = await _api.getCommentsForPost(postId);
    setBusy(false);
  }
}
The comments UI will also basically be exactly the same as the Posts UI. We use the BaseWidget, pass in our CommentsModel with the api and then render a list view from the model comments property.
@override
Widget build(BuildContext context) {
  return BaseWidget<CommentsModel>(
      onModelReady: (model) => model.fetchComments(postId),
      model: CommentsModel(api: Provider.of(context)),
      builder: (context, model, child) => model.busy
          ? Center(
              child: CircularProgressIndicator(),
            )
          : Expanded(
              child: ListView.builder(
                itemCount: model.comments.length,
                itemBuilder: (context, index) =>
                    CommentItem(model.comments[index]),
              ),
            ));
}
If you run this now it should be a fully functioning app.
Disposing
Last thing on my mind is always disposing, to perform this, each model will be disposed by provider if you use the default constructor. So all you have to do change the BaseWidget ChangeNotifierProvider constructor and then you can override the dispose in your model and execute code in there.
// base_widget.dart
@override
Widget build(BuildContext context) {
  return ChangeNotifierProvider<T>(
    builder: (context) => model,
    child: Consumer<T>(
      builder: widget.builder,
      child: widget.child,
    ),
  );
}
Then in your model you can just override normally.
  @override
  void dispose() {
    print('I have been disposed!!');
    super.dispose();
  }
You should see message logged there in your console for any model that’s closed like the comments model or the posts model when navigating back to the login view.
See this article for the pattern of implementing a service and using it in your models. Join me on Slack if you have any questions and let me know what you think about the architecture. Any improvements, any updates I’d gladly discuss and take into consideration.