Today we’ll go over something that’s very common and also very important for web development. Traditionally websites has taken up a large part of the screen. To keep the navigation within a web page less jarring certain parts of the view is kept in tact while the content you’re navigating to is replaced. The most common example of this is the Navigation bar on a website that stays the same even as you’re navigating to “different pages”. I put “different pages” in quotation marks because of the following.
This tutorial will continue from the code produced at the end of part 2. You can download the starting code here.
Implementation
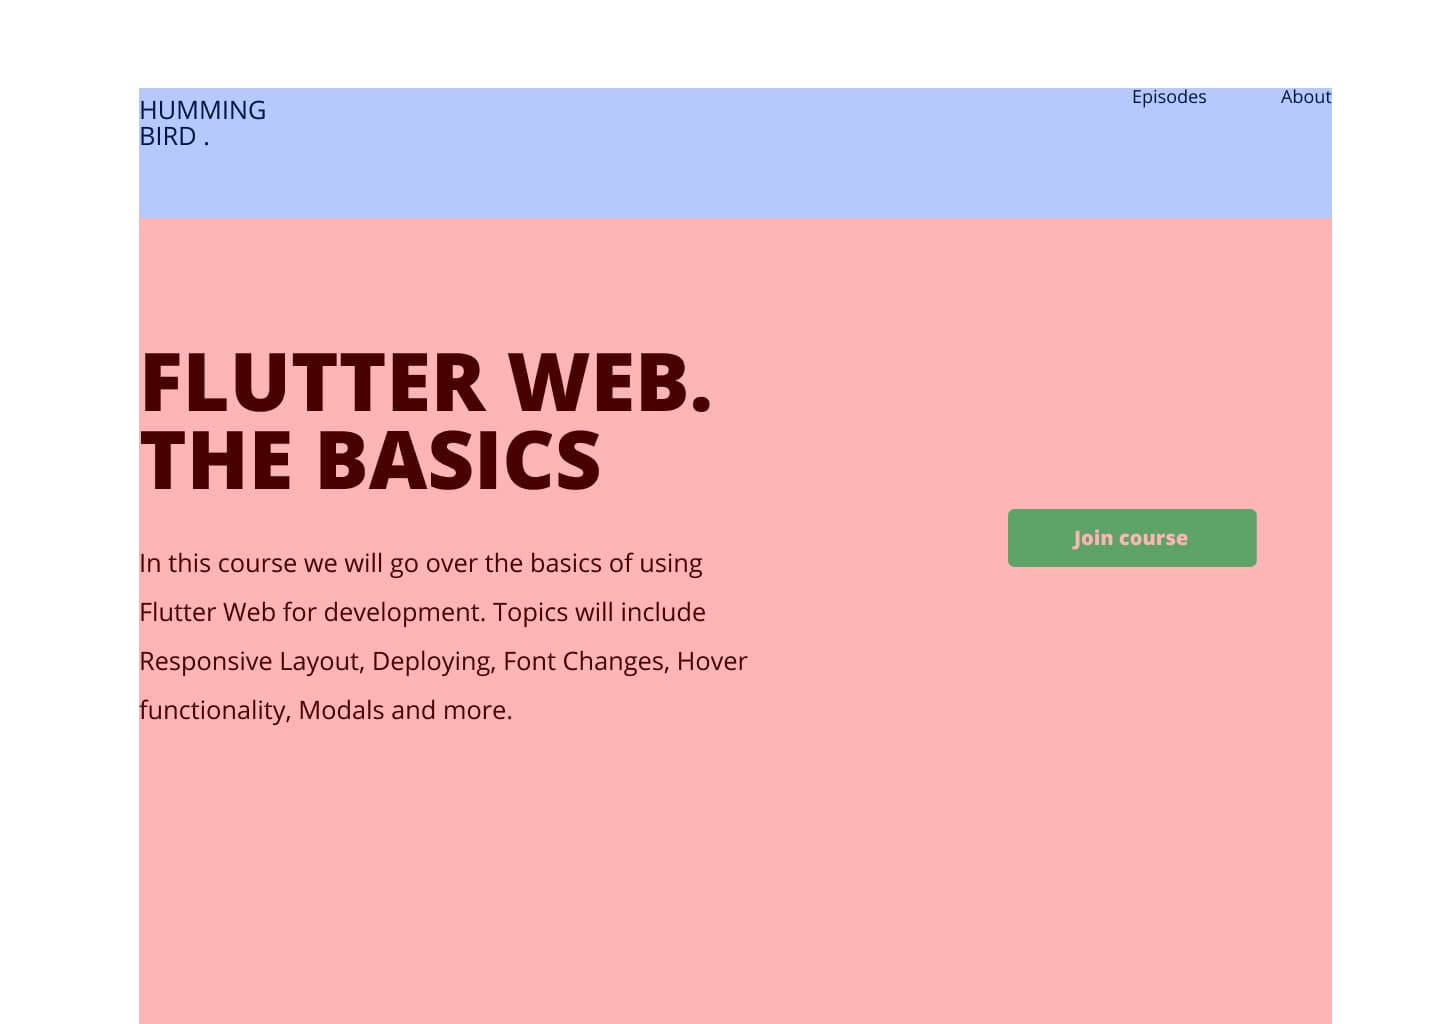
This is how we’ll be breaking up our website UI. For the website I’m building I want the blue section (Navigation bar) to stay exactly the same for every view. When we navigate to a view only the red section (Content) will swap out.
Layout Template
We’ll introduce a new widget called LayoutTemplate. This will be supplied as the root layout of the MaterialApp through the home property. It will contain all the NavigationBar and NavigationDrawer code that we currently have in the HomeView with one addition. The child of the expanded widget will be a navigator which will allow us to replace the content of the Expanded only using the navigation calls. Create a new folder under views called layout_template and inside a new file called layout_template.dart.
class LayoutTemplate extends StatelessWidget {
  const LayoutTemplate({Key key}) : super(key: key);

  @override
  Widget build(BuildContext context) {
    return ResponsiveBuilder(
      builder: (context, sizingInformation) => Scaffold(
        drawer: sizingInformation.isMobile ? NavigationDrawer() : null,
        backgroundColor: Colors.white,
        body: CenteredView(
          child: Column(
            children: <Widget>[
              NavigationBar(),
              Expanded(
                  child: Navigator(),
              )
            ],
          ),
        ),
      ),
    );
  }
}
Custom navigation
We know based on the design, when a user navigates somewhere we want the NavigationBar and NavigationDrawer UI to stay in place and only content section to swap out. Marked with red in the above image. To achieve that we need to embed a Navigator widget as the child of the Expanded child. I like to setup a NavigationService so I can navigate from my ViewModels (which we’ll add in a later episode). Create a new folder called services under lib and inside a new file called navigation_service.dart
class NavigationService {
  final GlobalKey<NavigatorState> navigatorKey =
      GlobalKey<NavigatorState>();

  Future<dynamic> navigateTo(String routeName) {
    return navigatorKey.currentState.pushNamed(routeName);
  }

  bool goBack() {
    return navigatorKey.currentState.pop();
  }
}
Quick Dislaimer Keep in mind, when using my Mvvm architecture setup the navigation service will be used in the viewModel and not in the UI. Only the viewModel should execute functions or perform actions that change the state of the navigation service or the app. We CAN still use it to supply a value like a key to the Navigator, but it shouldn’t execute functions that change state. In this tutorial we’ll do that, but that’s because we don’t have the viewmodels and state management setup properly yet.
Setup GetIt
Now that that’s out of the way we can setup get_it for our service location. Add the package to your pubspec
get_it:Create a new file under the lib folder called locator.dart
import 'package:get_it/get_it.dart';
import 'package:the_basics/services/navigation_service.dart';

GetIt locator = GetIt.instance;

void setupLocator() {
  locator.registerLazySingleton(() => NavigationService());
}
Then make sure to call setupLocator before the app is run. Open up main.dart and update your main function.
void main() {
  setupLocator();
  runApp(MyApp());
}
If the get_it stuff is confusing you can read a short post here that goes over how and why to use it.
Named Routing
I’ve covered navigation in Flutter in depth and today we’ll be using named routing in Flutter. A navigator expects a function that generates a route given a name, IF you’re using named navigation. We’ll create the function that will supply our different routes based on the names. First thing we’ll do is create a new folder called routing under the lib folder. Inside that folder we’ll create a new file called route_names.dart
const String HomeRoute = "home";
const String AboutRoute = "about";
const String EpisodesRoute = "episodes";
I’m keeping the names of the routes easily identifiable so that I don’t have to import using an alias to make it more readable. In the same routing folder create a new file called router.
Route<dynamic> generateRoute(RouteSettings settings) {
  print('generateRoute: ${settings.name}');
  switch (settings.name) {
    case HomeRoute:
      return _getPageRoute(HomeView());
    case EpisodesRoute:
      return _getPageRoute(EpisodesView());
    case AboutRoute:
      return _getPageRoute(AboutView());
    default:
      return _getPageRoute(HomeView());
  }
}

PageRoute _getPageRoute(Widget child) {
  return MaterialPageRoute(
    builder: (context) => child,
  );
}
What we’re doing here is setting up a switch statement to check which view we are requesting through the named navigation and then building and returning that widget within a MaterialPageRoute. Now that it’s all setup we can supply the code to our Navigator in the LayoutTemplate.
class LayoutTemplate extends StatelessWidget {
  const LayoutTemplate({Key key}) : super(key: key);

  @override
  Widget build(BuildContext context) {
    return ResponsiveBuilder(
      builder: (context, sizingInformation) => Scaffold(
              ...
              Expanded(
                  child: Navigator(
                key: locator<NavigationService>().navigatorKey,
                onGenerateRoute: generateRoute,
                initialRoute: HomeRoute,
              ))
            ],
          ),
        ),
      ),
    );
  }
}
We set the navigator key to the one we can control from the service. We supply the generateRoute call and set the initialRoute to the HomeRoute. Next up we can update the HomeView file to remove all the code that’s now in the LayoutTemplate and then also create two more views. Episodes and About.
class HomeView extends StatelessWidget {
  const HomeView({Key key}) : super(key: key);

  @override
  Widget build(BuildContext context) {
    return ScreenTypeLayout(
      mobile: HomeContentMobile(),
      desktop: HomeContentDesktop(),
    );
  }
}
Create a new folder under views called episodes and inside a new file called episodes_view.dart
class EpisodesView extends StatelessWidget {
  const EpisodesView({Key key}) : super(key: key);

  @override
  Widget build(BuildContext context) {
    return Center(
      child: Text('Episodes View'),
    );
  }
}
Create another folder under views called about, and inside a new file called about_view.dart
class AboutView extends StatelessWidget {
  const AboutView({Key key}) : super(key: key);

  @override
  Widget build(BuildContext context) {
    return Center(
      child: Text('About View'),
    );
  }
}
Now we have to perform the actual navigation. This will be done in the NavBarItem where we’ll access the NavigationService and navigateTo. You shouldn’t be doing this directly from the UI, but we won’t be covering the ViewModel setup in this article so we have to do it the bad way.
We’ll update the navbar_item. We’ll wrap the Text in a GestureDetector then call navigateTo onTap. We’ll also pass in an additional value which will be the navigationPath.
class NavBarItem extends StatelessWidget {
  final String title;
  final String navigationPath;
  const NavBarItem(this.title, this.navigationPath);

  @override
  Widget build(BuildContext context) {
    return GestureDetector(
      onTap: () {
        locator<NavigationService>().navigateTo(navigationPath);
      },
      child: Text(
        title,
        style: TextStyle(fontSize: 18),
      ),
    );
  }
}
Then we have to go through the code and update every where the NavBarItem is being used. Go to navigation_bar_tablet_desktop.dart and pass in the correct route for the items.
...
NavBarItem('Episodes', EpisodesRoute),
SizedBox(
  width: 60,
),
NavBarItem('About', AboutRoute),
...
Go to the DrawerItem and update the constructor to take in a new String, navigationPath and pass that to the NavBarItem. It should probably be one widget that changes it’s layout based on the screen type. You can do that as an exercise. Combine the NavBarItem and the DrawerItem into a single responsive widget.
class DrawerItem extends StatelessWidget {
  final String title;
  final IconData icon;
  final String navigationPath;
  const DrawerItem(this.title, this.icon, this.navigationPath);

  @override
  Widget build(BuildContext context) {
    return Padding(
      padding: const EdgeInsets.only(left: 30, top: 60),
      child: Row(
        children: <Widget>[
          Icon(icon),
          SizedBox(
            width: 30,
          ),
          NavBarItem(title, navigationPath)
        ],
      ),
    );
  }
}
Then head to the navigation_drawer and update the DrawerItem’s to take in the correct paths.
...
child: Column(
  children: <Widget>[
    NavigationDrawerHeader(),
    DrawerItem('Episodes', Icons.videocam, EpisodesRoute),
    DrawerItem('About', Icons.help, AboutRoute),
  ],
),
...
Run the code now and you’ll have a website where you can navigate keeping the nav bar constant and just swapping out the content section. Pretty legit, that code will all be rolled up into a package in time so it’ll go much faster. If you run the code now and click on Episodes or About you’ll see the content swap out with the default MaterialPage transition. One last thing I’d like to do is make it fade instead. Open the router.dart file, add the _FadeRoute class at the bottom of it and update the _getPageRoute function.
PageRoute _getPageRoute(Widget child) {
  return _FadeRoute(
    child: child,
  );
}

class _FadeRoute extends PageRouteBuilder {
  final Widget child;
  _FadeRoute({this.child})
      : super(
          pageBuilder: (
            BuildContext context,
            Animation<double> animation,
            Animation<double> secondaryAnimation,
          ) =>
              child,
          transitionsBuilder: (
            BuildContext context,
            Animation<double> animation,
            Animation<double> secondaryAnimation,
            Widget child,
          ) =>
              FadeTransition(
            opacity: animation,
            child: child,
          ),
        );
}
Now if you run the code the pages that you navigate to fade in and out. I don’t know how to match the url path in the browser with a custom nested navigator. As I explore I’ll probably figure that out. For now that’s it for the navigation. Using this you should be able to build a basic web app (without direct url navigation).
If you’re enjoying this series then follow me on Youtube where I release the episodes first before my written blog post.