Sometimes an application has to run an async function before it starts. Things things like crypto trading tools will have to be online so they’ll make a login request on start, online games as well or in my case, an app that fetches all it’s strings on startup from disk (or network if it’s the first time). It would be easy to build this into the HomeView, but some apps, like mine has 4 different startup screens depending on the config and we won’t build this into every view.
When the startup logic fails we want to give the user the option to retry again. So we’ll need to be able to put the app in the same state again as it was on startup. We’ll keep the example simple. When the app starts we’ll run the async function. The home of the MaterialApp will be a StreamBuilder that shows a different view based on the stream value.
Implementation
This is how we’ll implement the functionality. On start the Future to get the important data will be run. In this future we will add values onto a StreamController as it goes through the states. The home of the MaterialApp will be a StreamBuilder that listens to the stream from the previously mentioned controller. Based on the values from that stream we’ll show different UI’s. More specifically the following UI’s:
- NoData / Busy: Text with a loading indicator (We’ll user a CircularProgressIndicator, but you can use SpinKit too)
- Success : Yellow view to show Home
- Error: Text with a retry button that re-runs the future to get the important data ready
We’ll start off with a basic app
void main() => runApp(MyApp());

class MyApp extends StatelessWidget {
  @override
  Widget build(BuildContext context) {
    return MaterialApp(
      home: Container(),
    );
  }
}
We want to call the Future as the app starts up, but I’d like to keep MyApp as a stateless widget so we’ll create a stateful wrapper to do this for us. Create a new file called stateful_wrapper.dart. It’s a stateful widget that takes in a function called onInit and a child widget. Override the initState function and call onInit in the override.
class StatefulWrapper extends StatefulWidget {
  final Function onInit;
  final Widget child;
  StatefulWrapper({Key key, this.onInit, this.child}) : super(key: key);

  _StatefulWrapperState createState() => _StatefulWrapperState();
}

class _StatefulWrapperState extends State<StatefulWrapper> {
  @override
  void initState() {
    widget.onInit();
    super.initState();
  }

  @override
  Widget build(BuildContext context) {
    return widget.child;
  }
}
Next we’ll add the state enum we’ll be using. You should put this in it’s own file, I’m keeping it in the main.dart file for the example
enum StartupState { Busy, Success }Now lets add the StreamController that will emit our state and the future that will do the important work and add states onto the stream.
class MyApp extends StatelessWidget {

  final StreamController<StartupState> _startupStatus = StreamController<StartupState>();

  @override
  Widget build(BuildContext context) {
    return MaterialApp(
      home: Container(),
    );
  }

   Future getImportantData({bool isError = false}) async {
    _startupStatus.add(StartupState.Busy);
    await Future.delayed(Duration(seconds: 2));

    if (isError) {
      _startupStatus.add(StartupState.Error);
    } else {
      _startupStatus.add(StartupState.Success);
    }
  }
}
Now we can tie it all together. We want the future to be called when the view is initialised so we’ll use our StatefulWrapper and pass an onInit function. We’ll pass isError true so that we can go through all the states. The UI will be a Scaffold with the root child being our StatefulWrapper and the child of that wrapper will be a StreamBuilder that takes the startupStatus stream.
 @override
Widget build(BuildContext context) {
  return MaterialApp(
    home: Scaffold(
      body: StatefulWrapper(
          onInit: () => getImportantData(isError: true),
          child: StreamBuilder<StartupState>(
            stream: _startupStatus.stream,
            builder: (context, snapshot) {

            },
          ),
      ),
    ),
  );
}
And now we can finally add our UI. First UI bits we’ll check if the snapShot hasData, or if it’s busy and we’ll show a loading indicator.
 if (!snapshot.hasData || snapshot.data == StartupState.Busy) {
    return Center(
      child: Column(
        mainAxisSize: MainAxisSize.min,
        children: <Widget>[
          Text('Show your app logo here'),
          CircularProgressIndicator()
        ],
      ),
    );
  }
Then we want to check if the snapshot is of type error. If it is we’ll return the message from the error as well as an IconButton that we can use to retry.
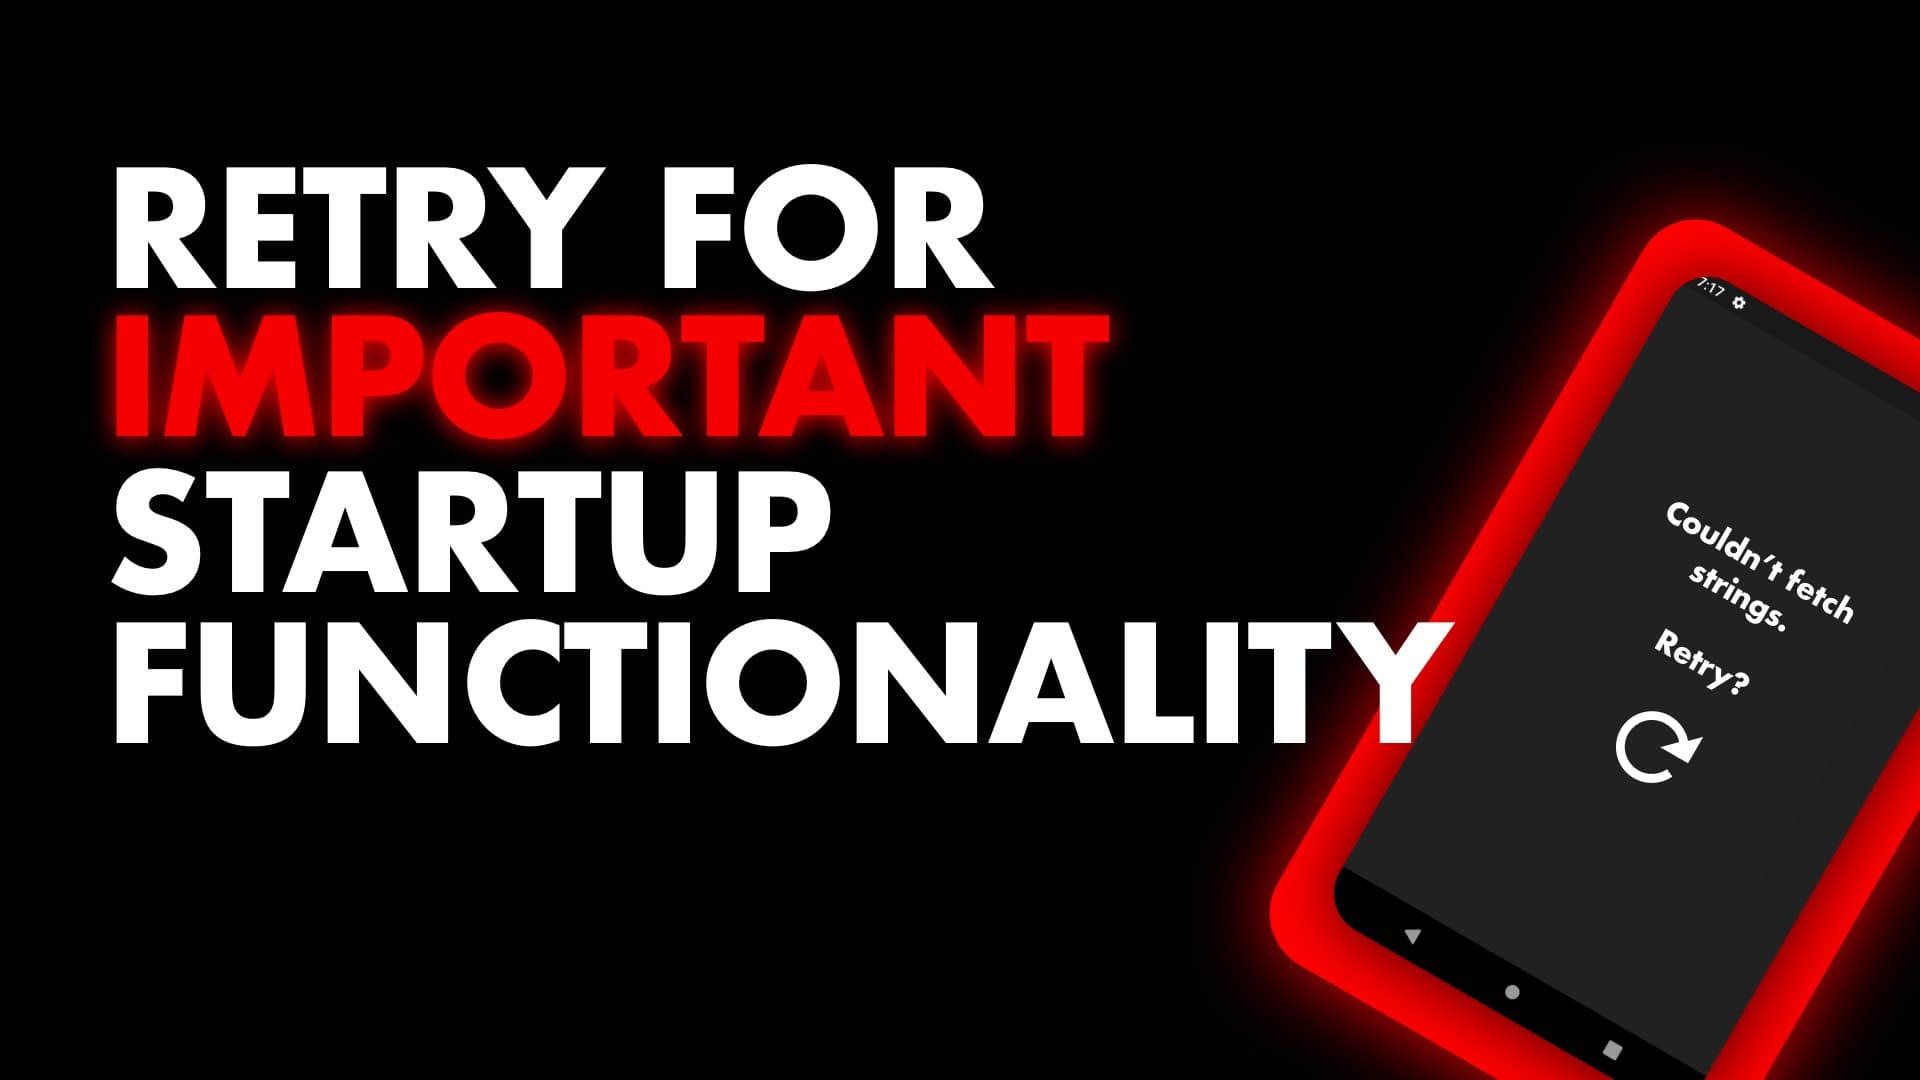
 if (snapshot.hasError) {
    return Center(
        child: Column(
      mainAxisSize: MainAxisSize.min,
      children: <Widget>[
        Text('${snapshot.error} Retry?'),
        IconButton(
          icon: Icon(
            Icons.refresh,
            size: 55,
          ),
          onPressed: () {
            getImportantData();
          },
        )
      ],
    ));
  }
And at the end of the builder function, where it’s a success, we’ll show a Yellow Container.
return Container(color: Colors.yellow);That’s how you can setup a simple retry on the start of your application. If you run the app you’ll see the loading indication, when that’s done you’ll get an error. Tapping the retry button will re-run the Future so you’ll see the loading again and then you’ll see success.
Check out some of the other Snippets for more Flutter guides.