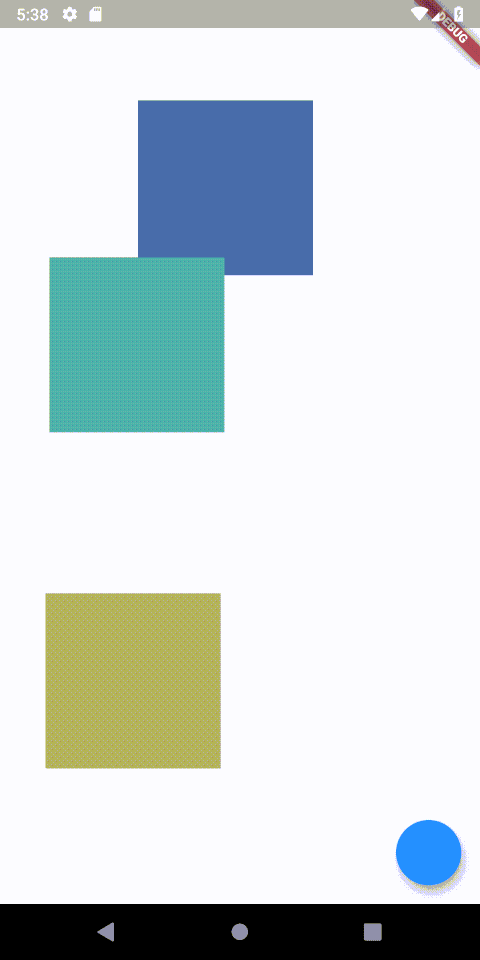
One of my super secret Flutter projects for the Desktop and Web makes use of a canvas and a draggable node interface. This tutorial will show how I used a stack to accomplish draggable functionality using widgets. Not drag and Drop. Draggable, like below.
We’ll be adding items onto the stack dynamically and to distinguish them I will be using a RandomColor genrerator. So we have to add that package.
random_color:Then we can create our HomeView that will contain our stack
class HomeView extends StatefulWidget {
  @override
  _HomeViewState createState() => _HomeViewState();
}

class _HomeViewState extends State<HomeView> {
  List<Widget> movableItems = [];

  @override
  Widget build(BuildContext context) {
    return Scaffold(
        body: Stack(
          children: movableItems,
        ));
  }
}
The functionality is quite simple. We’ll have a MoveableStackItem widget that’s stateful. It keeps track of its own position and color. The color is set on initialise and the position is updated through a GestureDetector.
class _MoveableStackItemState extends State<MoveableStackItem> {
  double xPosition = 0;
  double yPosition = 0;
  Color color;

  @override
  void initState() {
    color = RandomColor().randomColor();
    super.initState();
  }

  @override
  Widget build(BuildContext context) {
    return Positioned(
      top: yPosition,
      left: xPosition,
      child: GestureDetector(
        onPanUpdate: (tapInfo) {
          setState(() {
            xPosition += tapInfo.delta.dx;
            yPosition += tapInfo.delta.dy;
          });
        },
        child: Container(
          width: 150,
          height: 150,
          color: color,
        ),
      ),
    );
  }
}
Last thing to do is to add a new MoveableStackItem to the view. We’ll do that through a floating action button in the HomeView.
 return Scaffold(
  floatingActionButton: FloatingActionButton(
    onPressed: () {
      setState(() {
        movableItems.add(MoveableStackItem());
      });
    },
  ),
  body: Stack(
    children: movableItems,
  ));
And that’s it. Now you have a moveable stack item on your view. Check out the other snippets or last weeks Stack trick if you liked this one.